Amazon Route 53 — DNS and domains
What you’ll learn
Amazon Route 53 is AWS’s scalable DNS service. You can register domains in Route 53 (or keep a registrar elsewhere), create a public hosted zone, delegate name servers, and publish records that send users to EC2 or an Application Load Balancer.
This walkthrough follows the console flow used in the original screenshots; labels can shift slightly between UI revisions.
Prerequisites
- An AWS account with access to Route 53 and billing enabled for domain registration where required.
- Optional: an EC2 instance with a stable public IPv4 (for example via Elastic IP) or an Application Load Balancer DNS name.
Register a domain (optional)
You can register a new domain directly in Route 53 or transfer an existing one. Pricing and TLD availability vary.
- Sign in to the AWS Management Console.
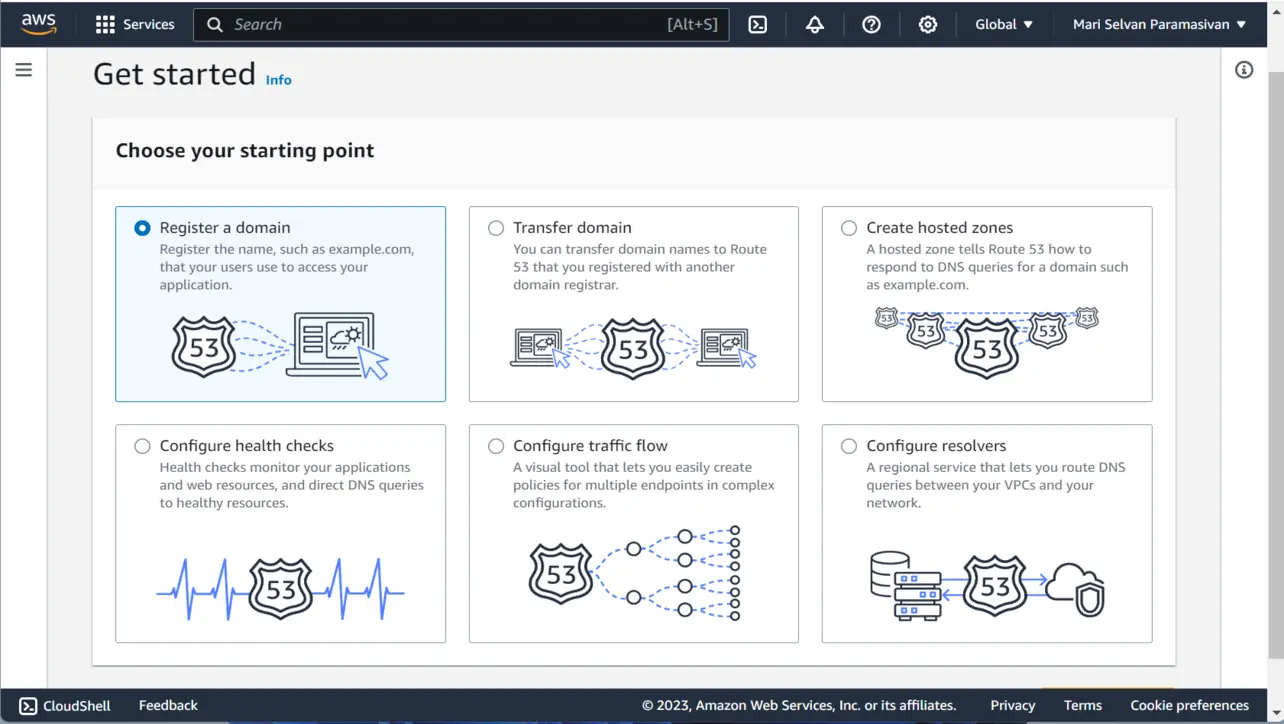
- Open Route 53 and choose Register domain (or Registered domains → Register domain).
Route 53 - Search for an available name and pick a TLD (for example .com or .net), then complete registration and contact-handle prompts.
Create a public hosted zone
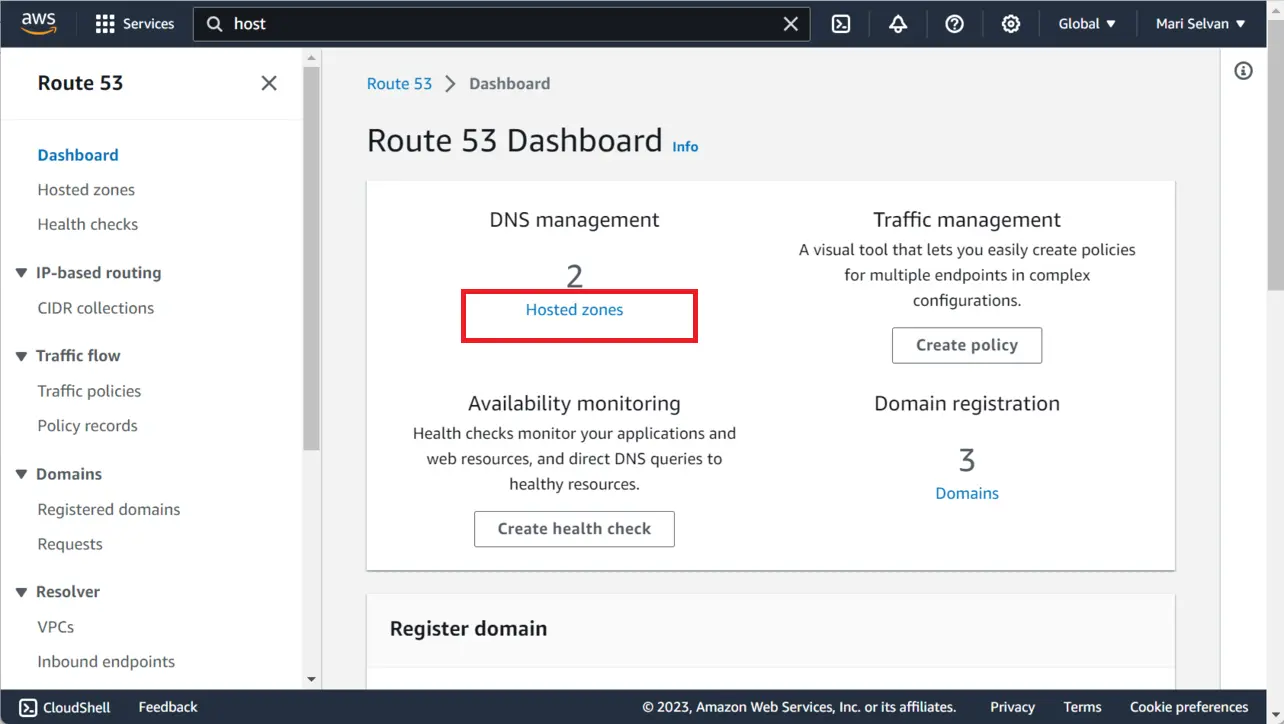
In Route 53, choose Hosted zones in the left navigation.
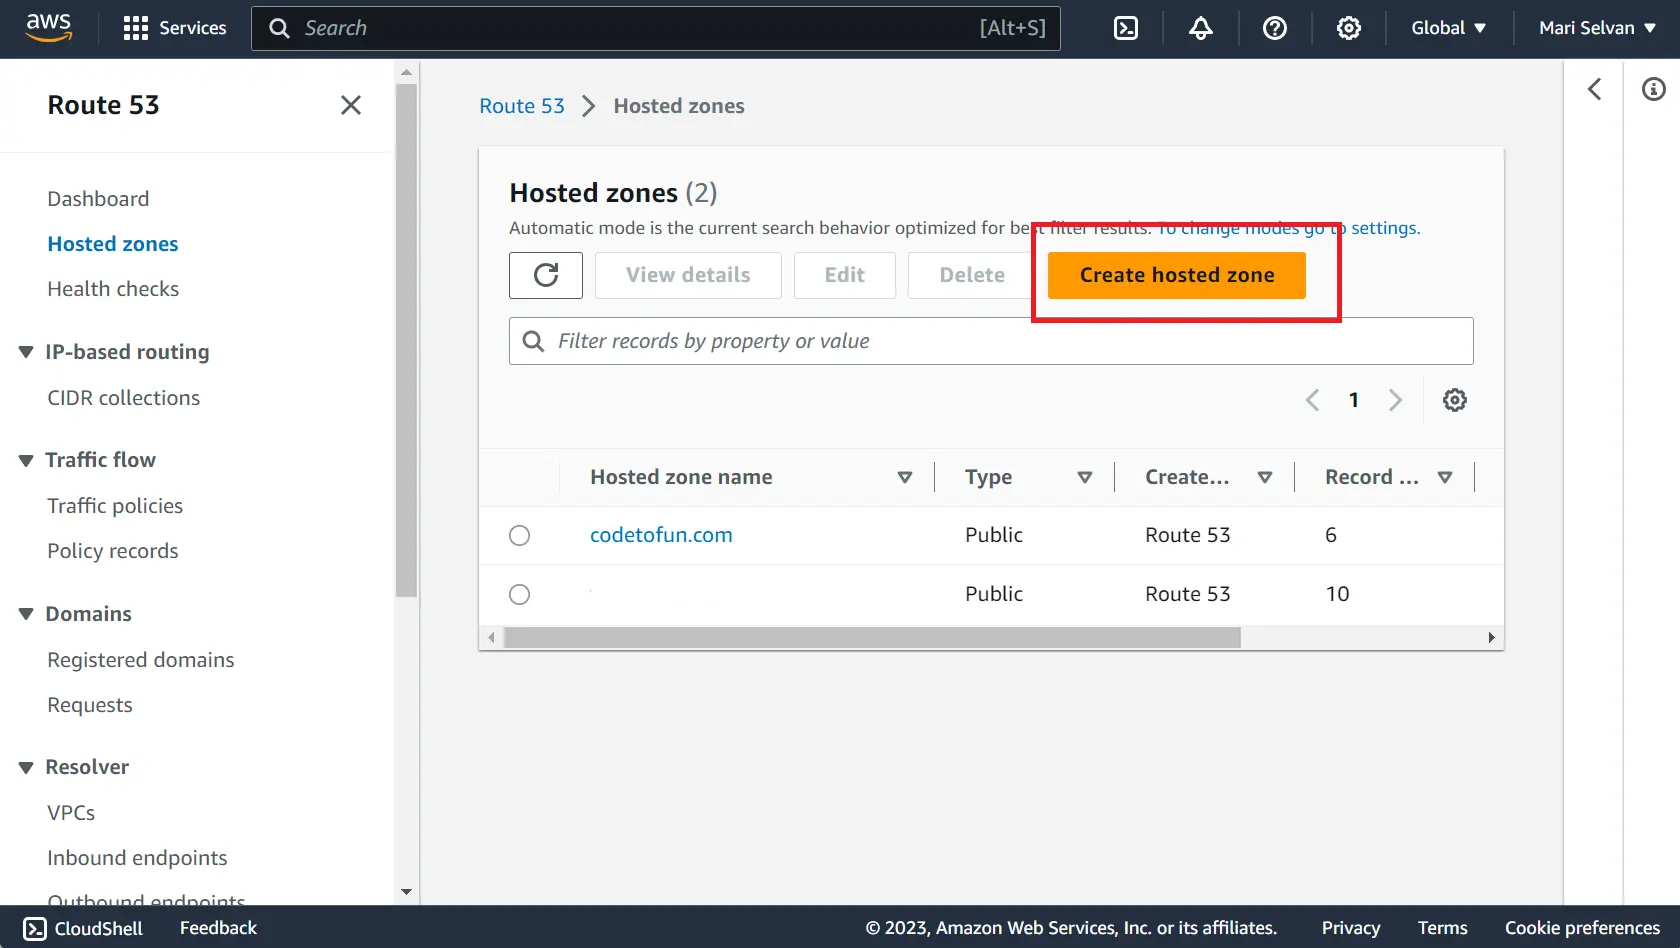
Route 53 Choose Create hosted zone.
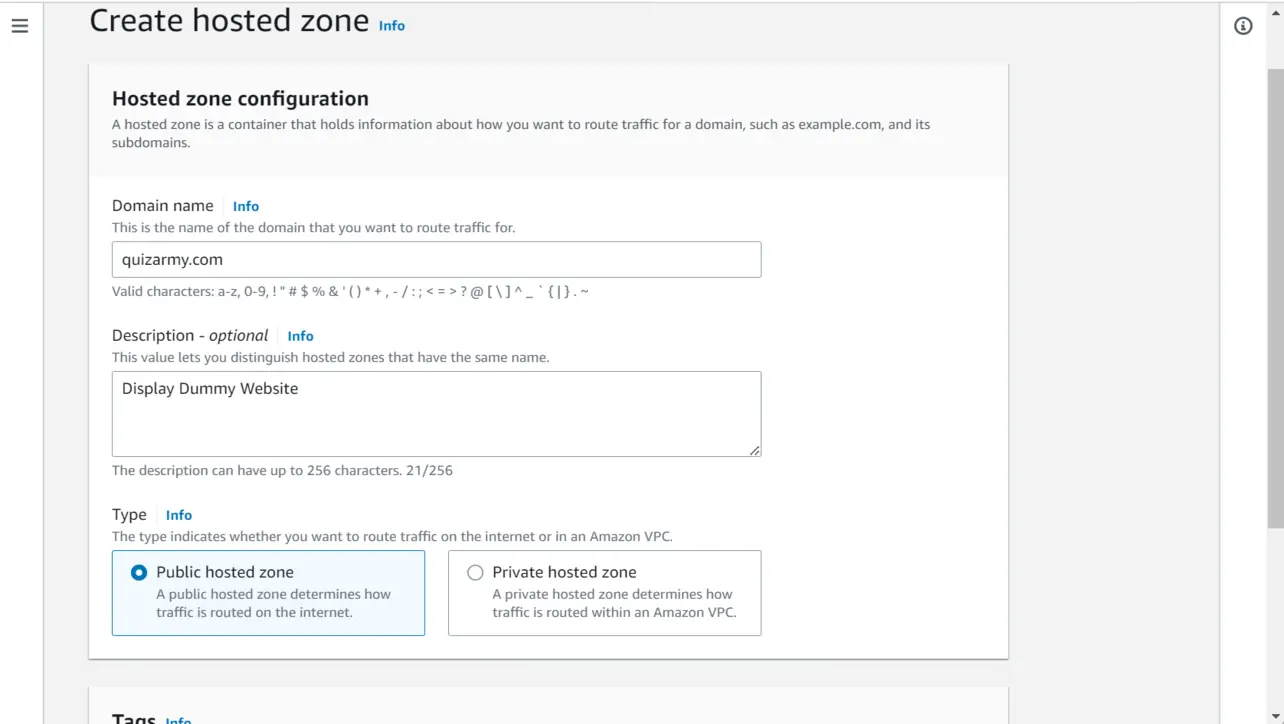
Route 53 Configure the zone:
- Domain name — the apex domain you will serve (for example
example.com). - Description — optional note for operators.
- Type — Public hosted zone for internet-facing DNS.
Route 53 - Domain name — the apex domain you will serve (for example
Create the hosted zone. Route 53 assigns a set of four authoritative name servers.
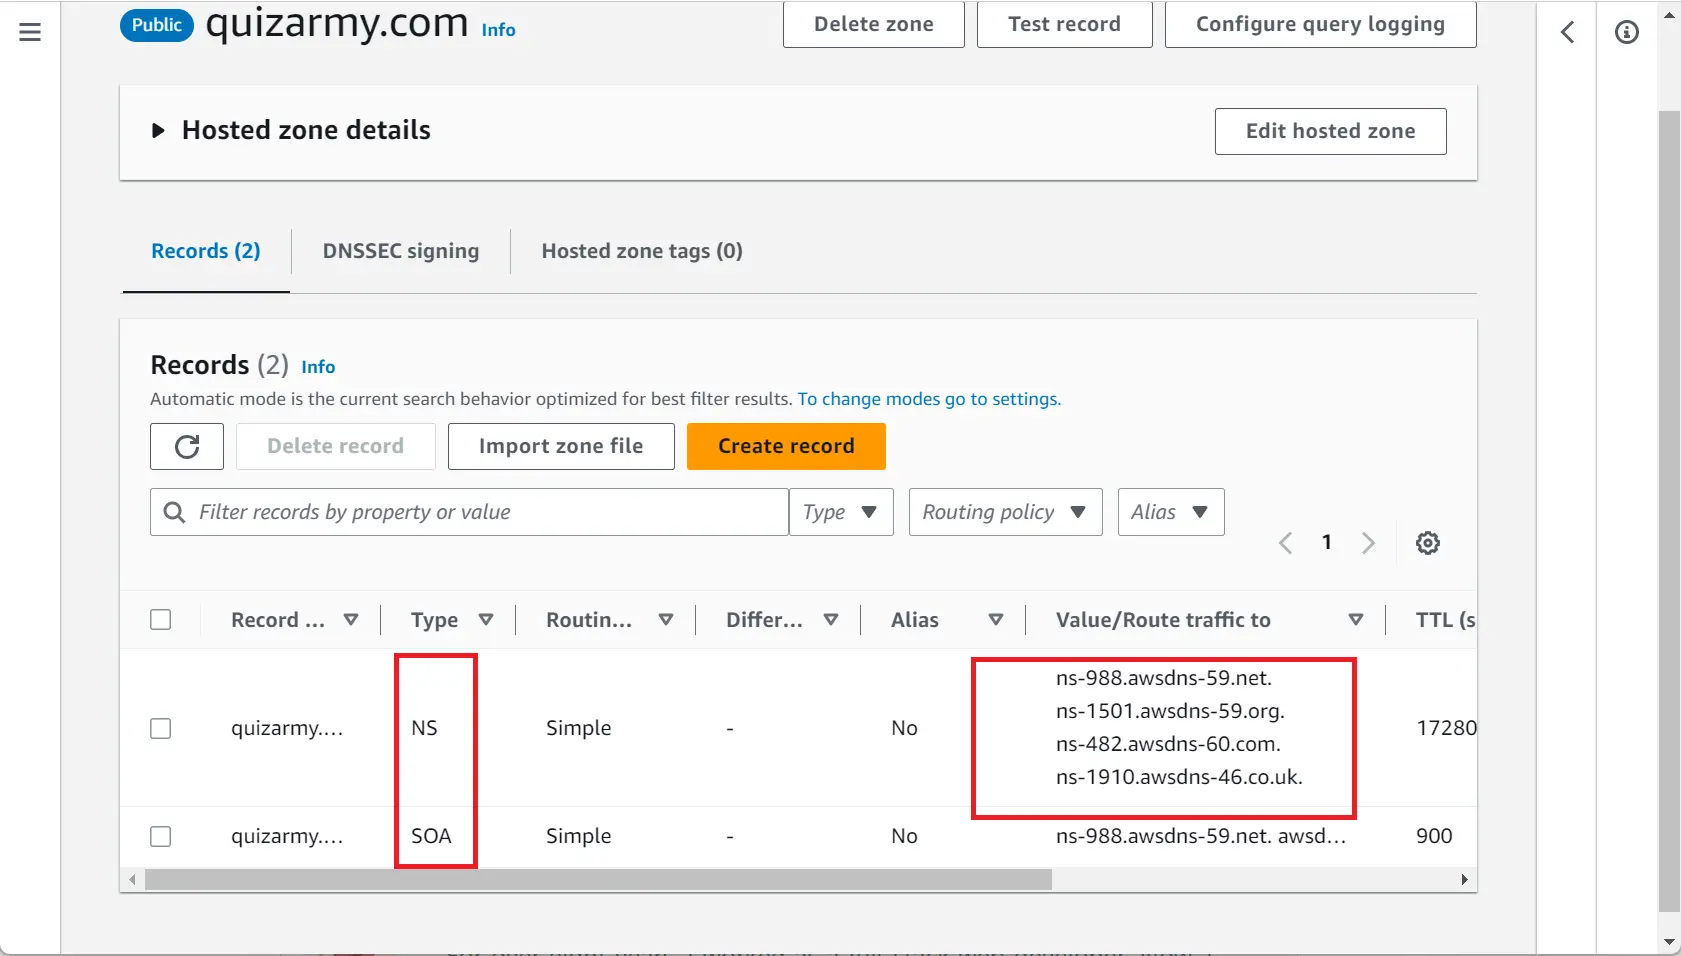
Route 53 Copy the four NS records and enter them at your registrar as the delegation set for the domain. If the domain is registered in Route 53, confirm the delegation page already references these servers; otherwise update the external registrar.
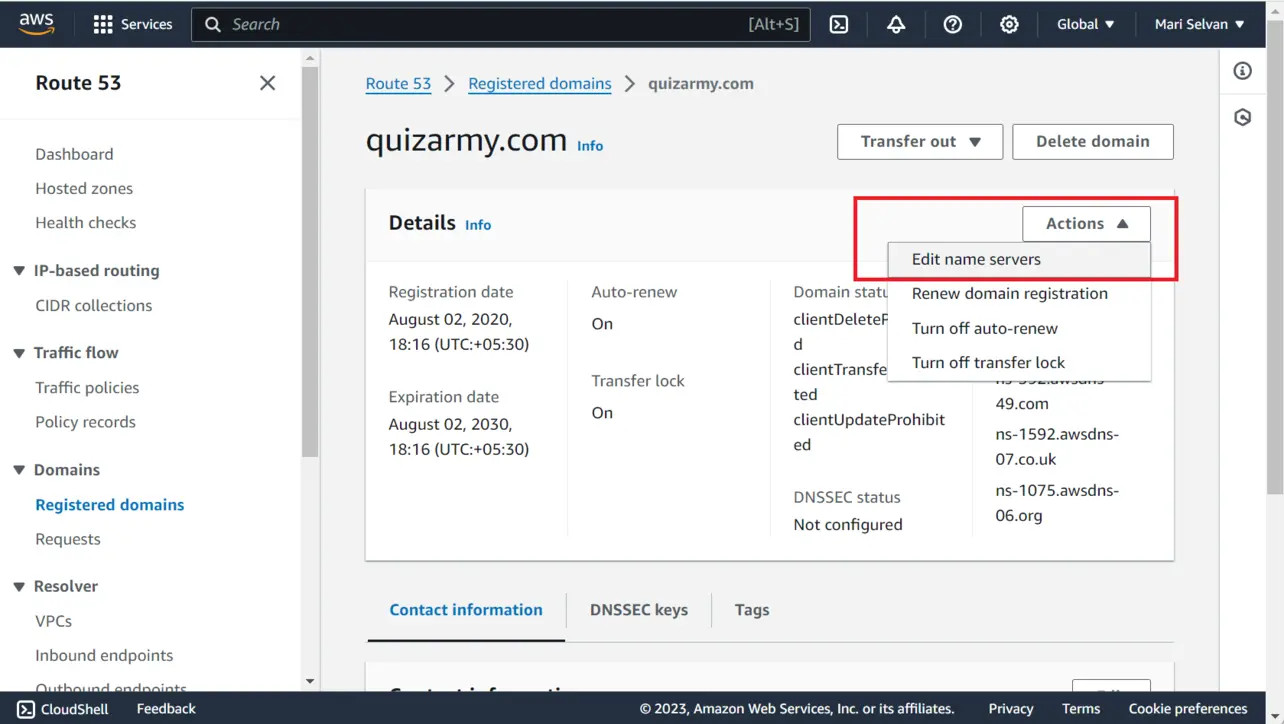
Registrar / Route 53
Point DNS at an EC2 public IPv4
Use this path when a single instance (with a stable Elastic IP) terminates TLS or plain HTTP directly. Skip to the next section if you front the site with an ALB instead.
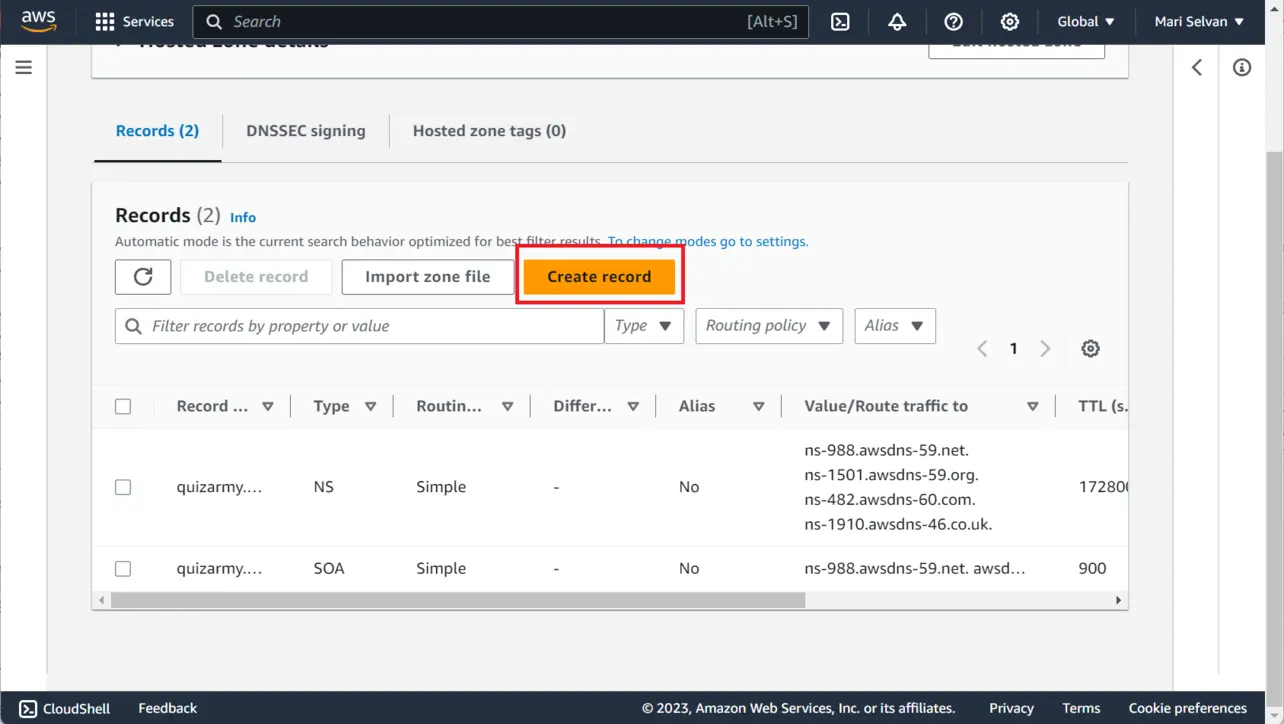
Open your hosted zone and choose Create record.
Route 53 Optional www hostname: create a CNAME (or a second A if you prefer) where the record name is
wwwand the value is your apex hostname (for exampleexample.com) or another canonical target you document for your app.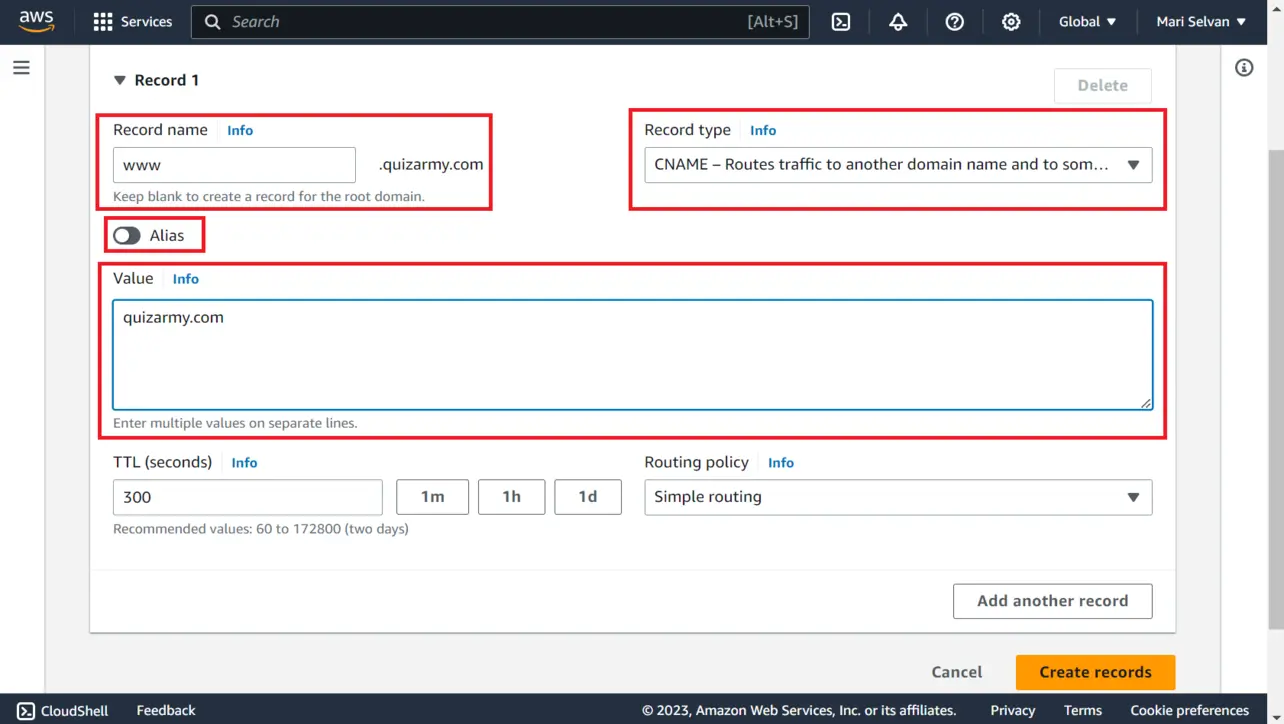
Route 53 Choose Create records.
Create an A record for the apex:
- Record name — leave blank for
example.comapex. - Record type — A.
- Alias — off for a raw IPv4 address.
- Value — the public IPv4 address (preferably your Elastic IP) of the instance.
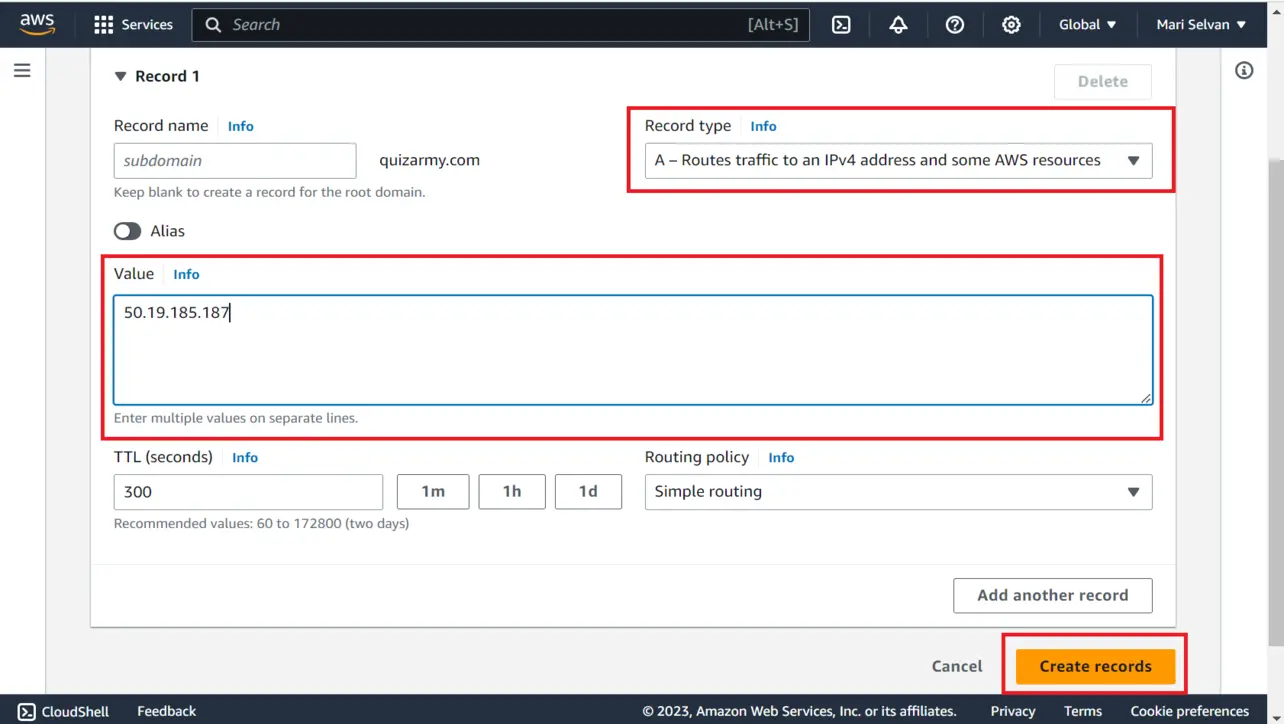
Route 53 Save the record and wait for resolver caches to refresh.
- Record name — leave blank for
Point DNS at an Application Load Balancer
For production web stacks, an ALB usually receives browser traffic. In Route 53, use an alias A (and AAAA if you enable IPv6) to the load balancer DNS name so AWS can keep targets healthy when addresses change.
In the same hosted zone, choose Create record.
Route 53 Optional www record: same pattern as above—a CNAME (or alias) for
wwwpointing at your chosen canonical name.Route 53 Choose Create records.
Create an alias A for the apex:
- Record name — blank for apex.
- Record type — A.
- Alias — enabled.
- Route traffic to — Alias to Application and Classic Load Balancer, pick the Region, then select your ALB DNS name from the list.
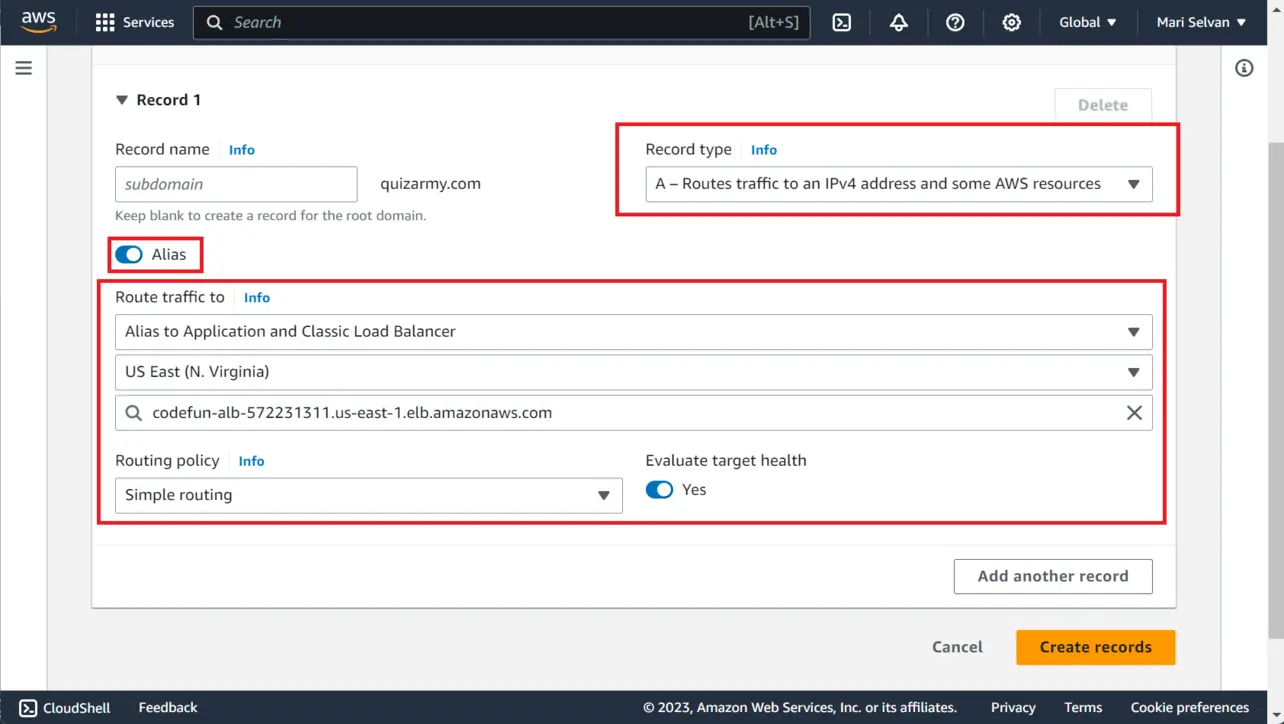
Route 53
Test resolution
- From a browser or with
dig/nslookup, query your apex andwwwnames. Open
https://your-domain.example(after TLS is configured) and confirm the expected site loads.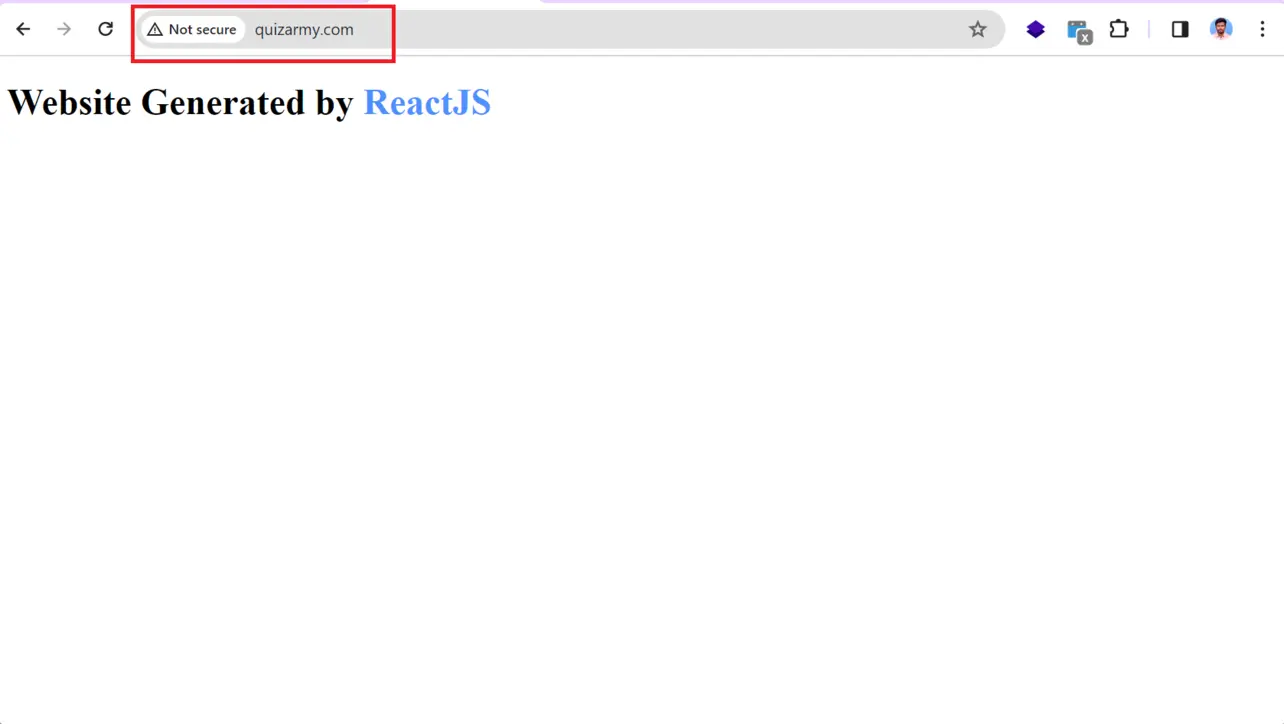
Browser
Key takeaways
A public hosted zone holds your authoritative records; delegation must match at the registrar.
Use alias A/AAAA to an ALB for apex routing; use A to an Elastic IP for a single instance.
Expect DNS caching after NS or record edits; plan cutovers during low traffic when possible.
Frequently asked questions
Next: canonical hostname
Once apex and www resolve to your load balancer, add listener rules so visitors land on a single preferred hostname.
After you change delegation at your registrar to Route 53 name servers, resolvers around the world update on their own TTL schedules. Allow up to 24–48 hours for full convergence; many updates appear sooner.
About the author


8 people found this page helpful