Exploring AWS Cloudfront
5 months ago

Photo Credit to CodeToFun
Amazon Elastic Compute Cloud (EC2) is a web service that provides resizable compute capacity in the cloud.
Launching an EC2 instance is a fundamental step in deploying applications on Amazon Web Services (AWS).
In this comprehensive guide, we'll walk you through the step-by-step process of launching an EC2 instance.
Before you begin, ensure you have the following:
Upon successfully logging in to the AWS Management Console, kindly proceed with the following steps to launch an AWS EC2 instance.
In the Find Services search bar, type EC2 and select EC2 from the results.

Photo Credit to CodeToFun
In the EC2 Dashboard, click the Instances link in the left sidebar and Click the Launch Instance button.

Photo Credit to CodeToFun
Choose an Instance Type - select the hardware of your instance. Each instance type comes with varying amounts of CPU, memory, and storage.
In this tutorial, we will choose Amazon Ubuntu EC2 Instance

Photo Credit to CodeToFun
Please scroll down slightly and click on the create new key pair link.

Photo Credit to CodeToFun
Follow these instructions to generate a key pair:
Now, click on Create Key Pair button.

Photo Credit to CodeToFun
Kindly scroll down a bit to access the Network settings, and ensure that you have selected the checkboxes of the following:

Photo Credit to CodeToFun
Review and Launch - review your configuration and click Launch.

Photo Credit to CodeToFun
Please return to the instances section to check the current status of the EC2 instance we just launched.
The image below depicts the successful launch and operation of our EC2 instance.
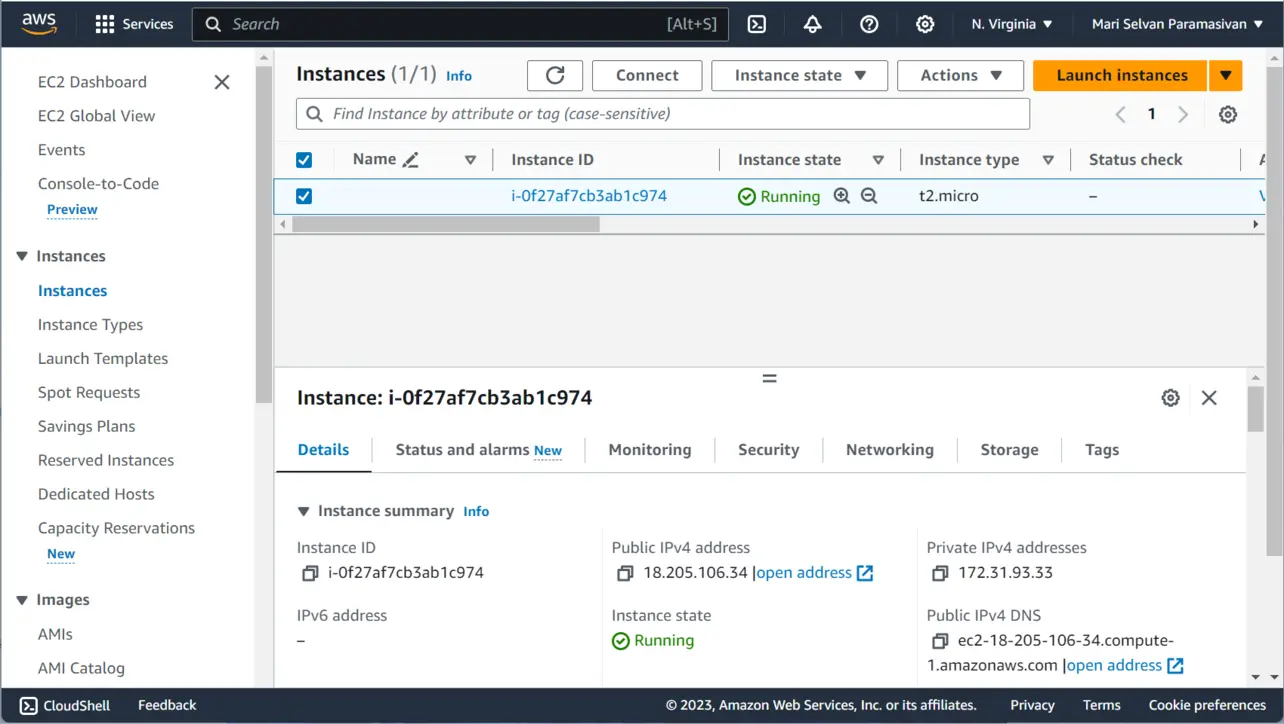
Photo Credit to CodeToFun
Congratulations! You have successfully launched an EC2 instance on AWS. This guide provides a basic overview, and there are many additional configuration options and features to explore based on your specific needs.
Remember to monitor and manage your instances through the AWS Management Console. For further customization and optimization, refer to the AWS documentation and explore additional AWS services that complement your EC2 instance.

For over eight years, I worked as a full-stack web developer. Now, I have chosen my profession as a full-time blogger at codetofun.com.
Buy me a coffee to make codetofun.com free for everyone.
Buy me a Coffee


If you have any doubts regarding this article (Guide to Launching an EC2 Instance (step-by-step)), please comment here. I will help you immediately.