Elastic IP — stable public IPv4 for EC2

What you’ll learn
Elastic IP addresses are static public IPv4 addresses for your AWS account. Associating one with an EC2 instance gives you a predictable address for SSH, HTTP, or DNS records, instead of relying solely on the auto-assigned public IPv4 that can change when you replace the instance or across some stop/start workflows.
How Elastic IP fits in
An Elastic IP is allocated to your account in a Region. You associate it with a network interface (commonly the primary ENI of an EC2 instance). You can disassociate and reassociate it to move the same public address to another instance for maintenance or failover drills.
This guide uses the IPv4 Elastic IP workflow. IPv6 on VPC uses different addressing patterns (for example /56 prefixes); see the VPC IP addressing documentation if you are standardizing on IPv6.
Prerequisites
- An AWS account with permission to allocate and associate Elastic IPs.
- A running EC2 instance in the same Region (for example one you created in the EC2 launch guide).
Allocate and associate an Elastic IP
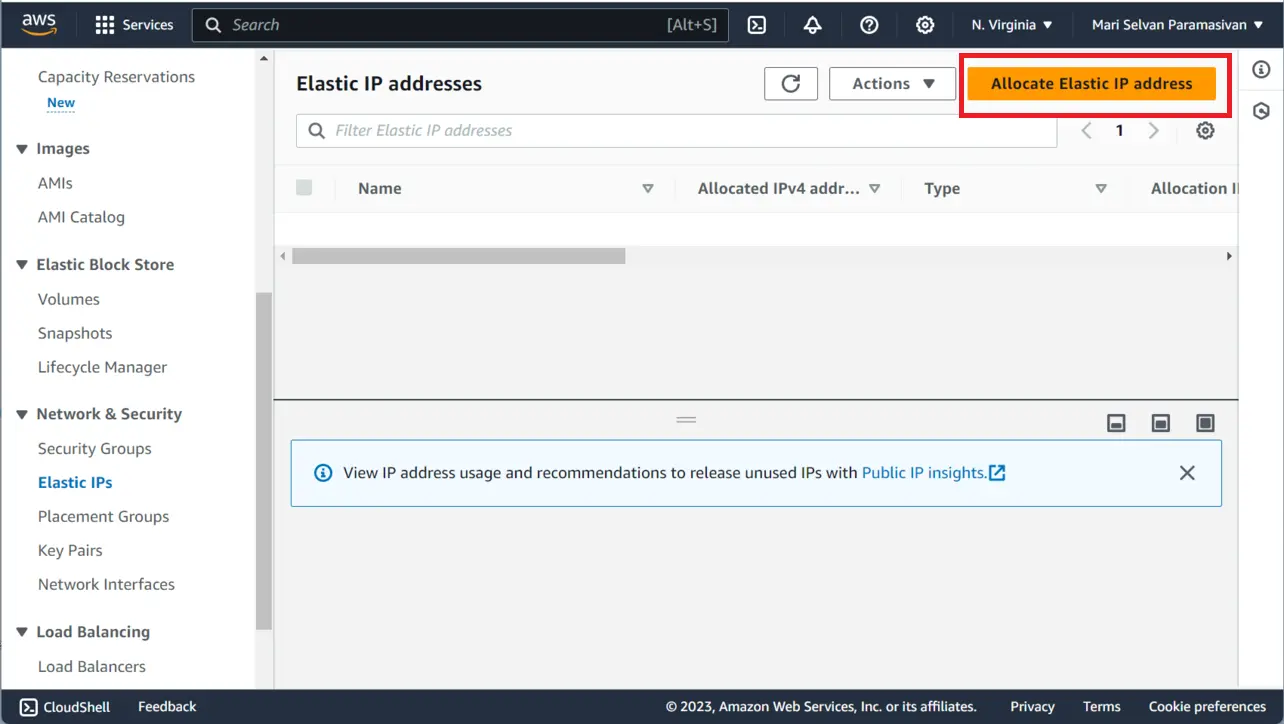
Open the EC2 console. In the left navigation under Network & Security, choose Elastic IPs. Choose Allocate Elastic IP address.
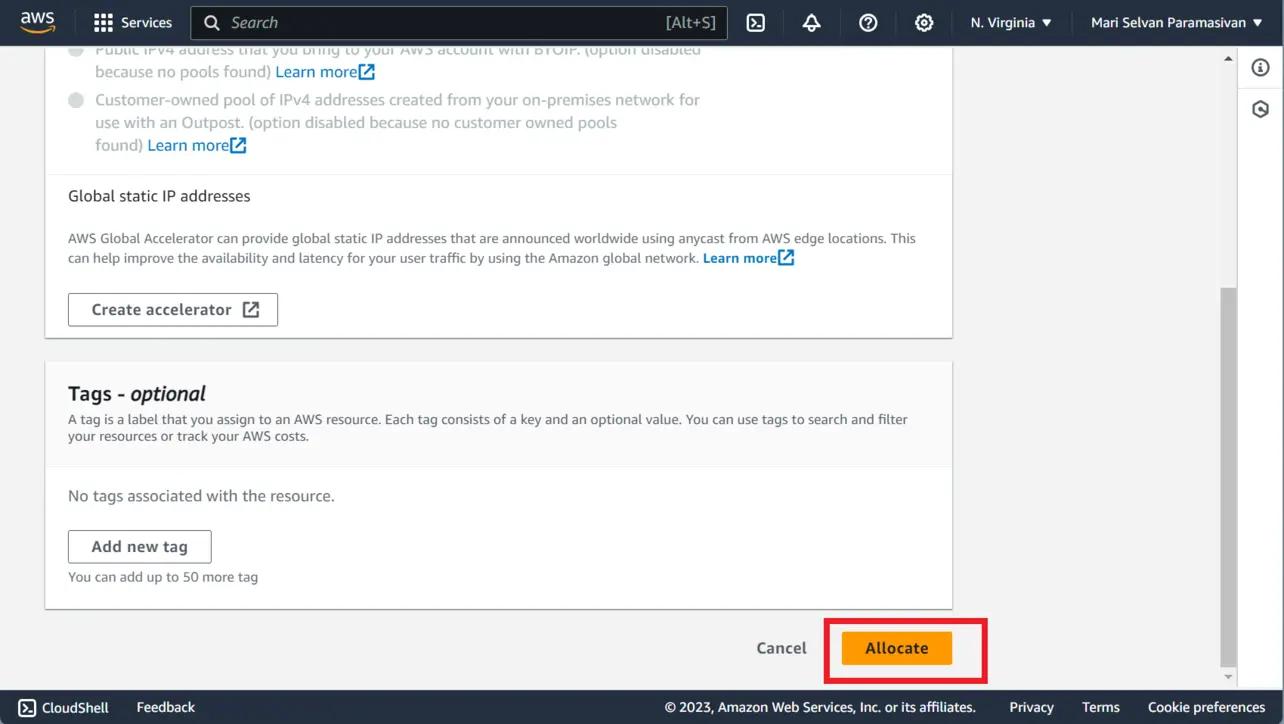
Amazon EC2 Review the allocation options (defaults are fine for many tutorials), then choose Allocate.
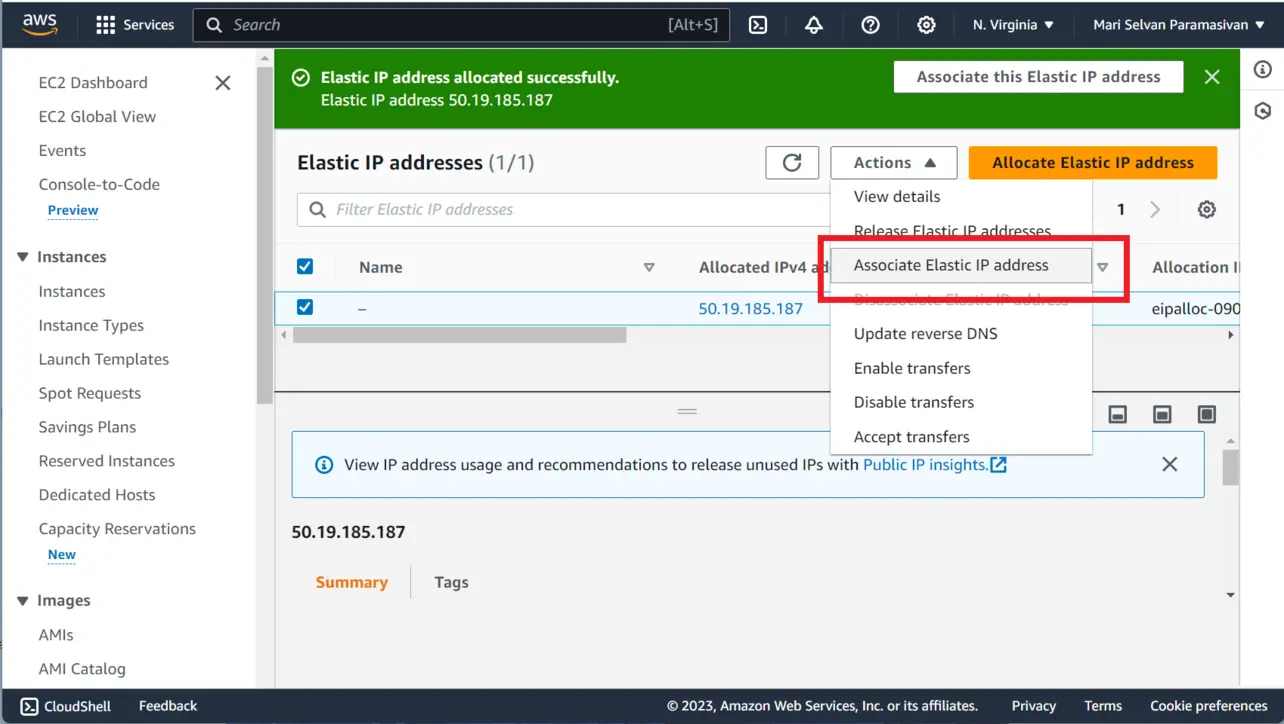
Amazon EC2 Select the new Elastic IP in the list. Open the Actions menu and choose Associate Elastic IP address.
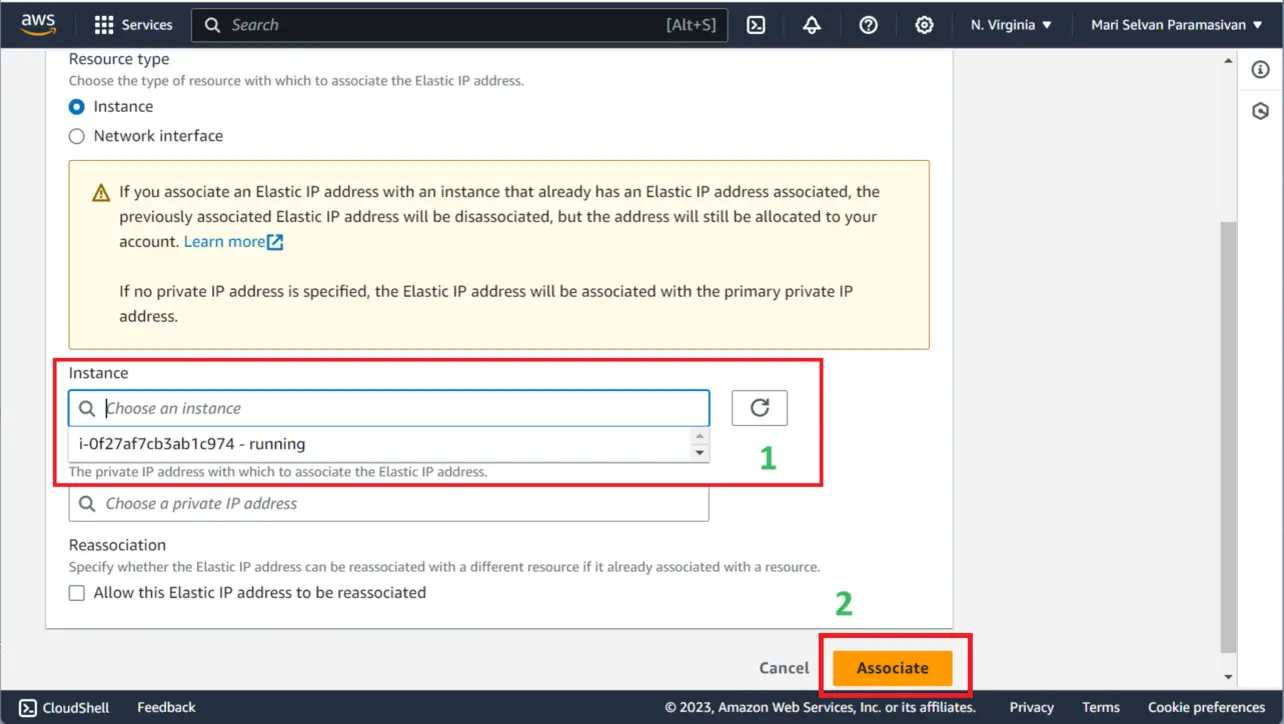
Amazon EC2 For Resource type, choose Instance. Pick your instance and the private IP to bind (usually the primary address). Choose Associate.
Amazon EC2 Return to Instances and confirm the instance shows the Elastic IP as its Public IPv4 address (or verify under the instance’s Networking tab).
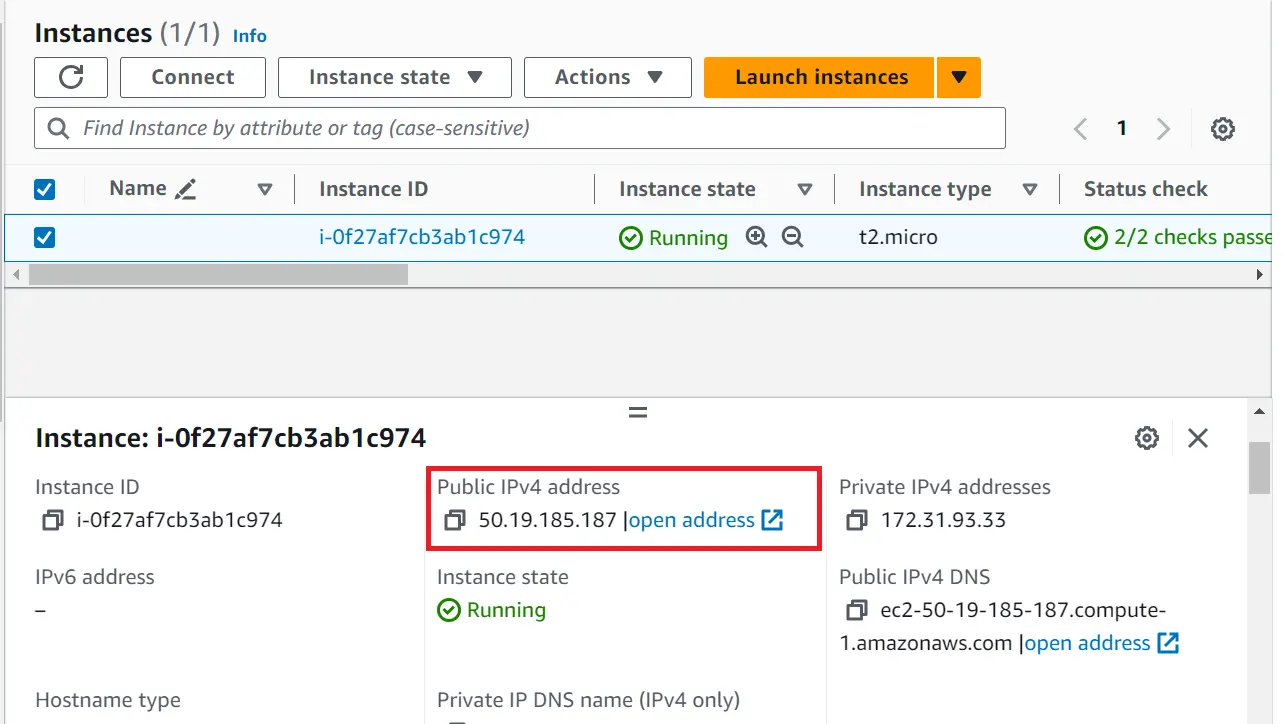
Amazon EC2
You have now mapped a stable public IPv4 to your instance for as long as you keep the association and the address allocated.
Why use an Elastic IP?
- Stable IPv4 — the address stays with your account until you release it, so DNS and firewall rules change less often.
- Fast remapping — move the same public IP to a replacement instance after maintenance.
- Predictable access — reduces surprises when the auto-assigned public IP would otherwise change across instance lifecycle events.
Operational habits
- Release unused Elastic IPs in the console when you tear down labs so idle addresses do not accrue charges.
- Stop/start planning — if you stop an instance that had an auto-assigned public IP, that address is usually lost on restart; with an Elastic IP associated, you keep the same public IPv4 when you start again (association still in place).
- Account limits — default quotas apply per Region; request a limit increase only if you truly need more static addresses.
Key takeaways
Allocate an Elastic IP in EC2 → Elastic IPs, then Associate it with your instance’s network interface.
Use Elastic IP when you need a fixed public IPv4 for DNS, allow lists, or operational runbooks.
Watch for charges on unattached or idle Elastic IPs; release what you do not use.
Frequently asked questions
Next: SSH with PuTTY
With a stable public IPv4, open a shell from Windows using PuTTY and your key pair before you upload code with SFTP.
If you point a DNS A record at your instance’s public IPv4, that record should target a stable address. Without an Elastic IP, stop/start or replace can change the public IPv4 and viewers may see timeouts until DNS is updated.
About the author


8 people found this page helpful