Right-Angled Triangle Star Pattern in Python

Beginner
⏱️ 8 min read
📚 Updated: Aug 2026
🎯 3 Code Examples
🚀 Live Preview
Nested Loops

What You’ll Learn

The right-angled triangle star pattern is the classic first console pattern: nested loops, print(..., end="") vs print(), and a clear visual result. This tutorial covers the shape rule, loop structure, a live preview, algorithm steps, worked Python examples, edge cases, and complexity.

Shape Rule

i stars on row i

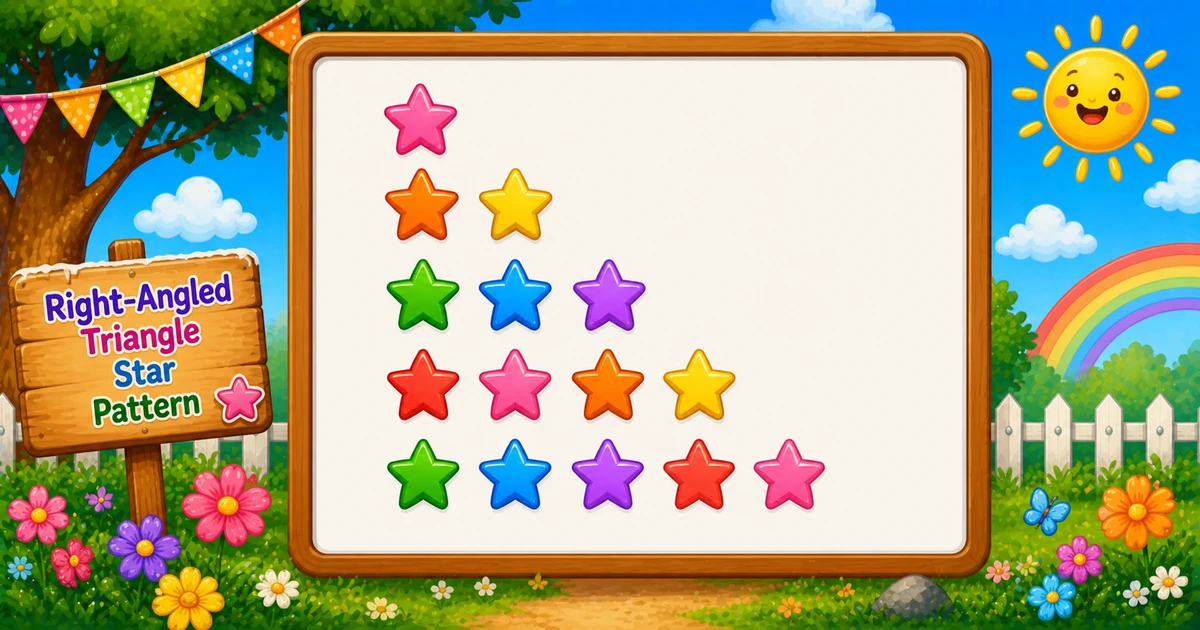
Row 1 prints *, row 2 prints **, up to rows stars on the last line.

Outer Loop

Rows

for i in range(1, rows + 1): walks each line of the triangle.

Inner Loop

Stars

for j in range(1, i + 1): prints exactly i stars on that row.

print end= vs print()

Same line / next line

Stars use print("*", end=""); end each row with print().

Live Preview

1–20 rows

Pick a row count and draw the triangle instantly in the browser.

O(n²)

Complexity

Total stars = n(n+1)/2; extra memory stays O(1).

Introduction

A right-angled triangle star pattern grows by one * on each new line. With the right angle on the left, the console output looks like a staircase of stars.

In Python you usually solve it with two nested for loops: the outer loop picks the row, the inner loop prints stars on that row, then print() moves to the next line.

Why it matters?

It is the standard first pattern exercise in Python courses. Once nested loops and print(..., end="")/print() click, pyramids, diamonds, and hollow shapes become much easier.

Key Highlights

Row = Star Count

On row i, print exactly i stars.

Two Nested Loops

Outer controls rows; inner prints characters.

Print Then Break

print("*", end="") in the inner loop; print() after.

Series Foundation

Gateway to inverted, pyramid, and hollow patterns.

In short: for each row i from 1 to rows, print i stars with print("*", end=""), then call print().

📝 Problem & Approach

Given a positive integer rows, print a left-aligned right-angled triangle of * characters with rows lines.

Python
# First 5 rows (conceptual shape)
# *
# **
# ***
# ****
# *****

Inputs & Outputs

ItemTypeDescription
rowsintNumber of triangle lines to print (typically ≥ 1).
Printed outputtextLeft-aligned rows of *; row i has i stars.

Minimal workflow

Pseudocode
for i from 1 to rows:
    for j from 1 to i:
        print "*" (no newline)
    print newline

Approach comparison

ApproachIdeaBest for
Nested loopsOuter rows + inner starsLearning and interviews
"*" * iBuild a whole row in one callShorter production-style demos

⚡ Quick Reference

GoalPattern
Walk each rowfor i in range(1, rows + 1):
Print i starsfor j in range(1, i + 1): print("*", end="")
End the rowprint()
One-line row shortcutprint("*" * i)
Invert laterfor i in range(rows, 0, -1): (see Program 2)

📋 print end= vs print() vs *

Same triangle — different ways to emit characters.

print(..., end="")
same line

Prints a star without moving to the next line

print()
new line

Ends the current row after all stars are printed

"*" * i
whole row

Builds i stars at once — skip the inner loop

Learning tip
loops first

Master nested loops before the string shortcut

Context

When This Pattern Shows Up

Reach for this triangle when teaching or testing nested-loop basics.

  1. First lab exercise

    Most Python pattern series start here before pyramids and diamonds.

  2. Nested-loop warm-up

    Outer/inner bound practice with an immediate visual check.

  3. Console output practice

    Combine loops with ReadLine for a flexible row count.

  4. Gateway to variants

    Invert, center, hollow, or swap * for digits/letters next.

  5. Not a UI layout tool

    This is a console teaching pattern — not how you build modern app screens.

Key benefit: one small program that locks in nested loops, output sequencing, and O(n²) thinking.

🔮 Live Preview

Choose a row count between 1 and 20 and draw the right-angled triangle in the browser.

Try 5, 7, or 10. Larger values still work up to 20.

Live result
Press "Draw pattern".

Examples Gallery

Three complete Python programs — fixed row count, console input, and a "*" * i shortcut. Click View Output to reveal sample console results.

📚 Getting Started

Print five rows with classic nested loops.

Example 1 — Fixed rows = 5

Hard-coded height — ideal for first demos and screenshots.

Python
rows = 5

for i in range(1, rows + 1):
    for j in range(1, i + 1):
        print("*", end="")
    print()

How It Works

When i = 1, the inner loop runs once and prints *. When i = 2, it prints **, and so on until i = rows. print() after the inner loop starts the next row.

📈 Practical Variant

Let the user choose the height at runtime.

Example 2 — User Input Version

Read the row count with input() and int() (wrap in try/except ValueError in real apps).

Python
rows = int(input("Enter the number of rows: "))

for i in range(1, rows + 1):
    for j in range(1, i + 1):
        print("*", end="")
    print()

How It Works

Same nested-loop core as Example 1; only the source of rows changes. Non-numeric input raises ValueError with bare int(input()) — use try/except for safer labs.

⚡ Shortcut Style

Same shape without an explicit inner star loop.

Example 3 — "*" * i

Build each row in one call, then print it.

Python
rows = 5

for i in range(1, rows + 1):
    print("*" * i)

How It Works

"*" * i creates a string of length i filled with stars. Great once you understand the nested-loop idea; keep the two-loop version for exams that ask you to show both bounds.

🧠 How the Algorithm Prints Rows

1

Set up

public static void main is the entry point. Set rows (fixed or from input).

Setup
2

Outer loop (rows)

for i in range(1, rows + 1): selects the current line.

Row
3

Inner loop (stars)

for j in range(1, i + 1): prints exactly i stars with print("*", end="").

Stars
4

New line

print() ends the row so the next outer iteration starts fresh.

Break
=

Triangle complete

Total stars: 1+2+…+n = n(n+1)/2O(n²) time, O(1) extra memory.

🔎 Worked Walkthrough — rows = 4

Trace each outer-loop value of i and count how many times the inner loop runs.

iInner j rangePrinted rowStars this row
11..1*1
21..2**2
31..3***3
41..4****4

Total star prints: 1 + 2 + 3 + 4 = 10 = 4×5/2.

Use Cases

Where this tiny pattern (and its loop structure) shows up beyond the homework prompt.

1. Teaching Nested Loops

Clearest visual proof that outer and inner bounds interact.

Example: change j <= i and watch the shape change.

2. Pattern Series Base

Foundation for inverted, pyramid, diamond, and hollow variants.

Example: Program 2 only reverses the outer loop.

3. Console Formatting Drills

Practice print(..., end="") vs print() without complex math.

Example: put print() inside the inner loop by mistake.

4. Character Substitution

Swap * for digits, letters, or emoji once the loop works.

Example: print i instead of * for a number triangle.

5. Complexity Intuition

Triangular totals make O(n²) concrete for beginners.

Example: count printed stars for n = 10 → 55.

6. Input Validation Labs

Pair the pattern with input validation and positive-row checks.

Example: reject rows <= 0 and re-prompt.

Pro Tip: when an interviewer asks for patterns, explain the outer/inner roles first — then write the loops. The story matters as much as the code.

Advantages

Why this pattern earns a permanent spot in beginner Python courses.

  1. 1. Instant Visual Feedback

    Wrong bounds show up immediately as a broken staircase.

  2. 2. Minimal Concepts

    Only loops and console output — no arrays or math libraries.

  3. 3. Easy to Extend

    Invert, center, hollow, or change the fill character with small edits.

  4. 4. O(1) Extra Memory

    Streaming output needs no storage beyond loop counters.

Pro Tip: learn the nested-loop version first; treat "*" * i as a polish shortcut afterward.

Usage Tips

Small habits that keep star-pattern code clean.

  1. 1. Name Bounds Clearly

    Use rows (or n) and keep i/j for row/column — or rename to row/col.

  2. 2. Wrap int(input()) in try/except

    Avoid crashes when the user types letters instead of a number.

  3. 3. Keep print() Outside

    Only call print() after the inner loop finishes the row.

  4. 4. Start 1-Based for This Shape

    1..rows with j <= i matches “row i has i stars” naturally.

  5. 5. Dry-Run One Small n

    Trace rows = 3 on paper before coding larger demos.

Pro Tip: if the output is a vertical list of single stars, you almost certainly put print() inside the inner loop.

Common Pitfalls

Mistakes that commonly break right-angled star patterns.

  1. 1. print() Inside the Inner Loop

    Each star lands on its own line — you get a column, not a triangle.

    → Use print("*", end="") for stars; print() only after the inner loop.

  2. 2. Wrong Inner Bound

    j <= rows prints a rectangle; j < i drops a star each row.

    → For this shape, keep j <= i.

  3. 3. Forgetting the Row Break

    Omitting print() after the inner loop glues every star onto one endless line.

    → Always end the row after the inner loop.

  4. 4. Blind int(input())

    Letters or empty input raise ValueError.

    → Catch ValueError and re-prompt on failure.

  5. 5. Off-by-One on 0-Based Loops

    Switching to i = 0 without adjusting the inner bound prints an empty first row or wrong counts.

    → If 0-based, print i + 1 stars (e.g. j <= i + 1).

Edge Cases

Check these inputs before calling the solution done.

rows = 1

Single star

Output is just * on one line.

rows = 0

Empty pattern

Outer loop never runs — print nothing or show a message.

Negative

rows < 0

Treat as invalid; re-prompt instead of silent empty output.

Large n

Many rows

Output grows as n²/2 characters — fine for labs, noisy for huge n.

Bad input

Non-numeric ReadLine

int(input()) raises ValueError — validate first.

Fill char

Not only *

Same loops work with #, digits, or letters.

🎯 Practice Problems

Try these variations to lock in the pattern.

1. Invert the triangle

  • Outer loop from rows down to 1
  • Continue with Program 2

2. Print digits instead

  • Replace * with j or i
  • Shows the loop structure is reusable

3. Safe input loop

  • Validate input until rows >= 1
  • Then draw the triangle

4. Hollow right triangle

  • Print * only on borders; spaces inside
  • Harder follow-up after this page

Notes

  • Triangular count. Total stars for n rows is n(n+1)/2 — hence O(n²) time.
  • print(..., end="") stays on the line; print() advances — mix them carefully.
  • Validate rows > 0 for interactive programs; rows = 1 should print a single star.
  • This page is left-aligned. Centered pyramids need leading spaces — covered later in the series.

Quick Takeaway: outer loop picks the row, inner loop prints i stars, then break the line — that is the whole pattern.

⏱️ Time and Space Complexity

ProgramTimeExtra space
Nested loops (Examples 1–2)O(rows²)O(1)
"*" * i (Example 3)O(rows²)O(rows) per row string (temporary)
Wrap Up

🎉 Conclusion

The right-angled triangle star pattern is a small nested-loop exercise with lasting payoff: row/column thinking, print(..., end="") vs print(), and O(n²) intuition. Master the classic two-loop version, then optionally shorten rows with "*" * i.

Practice the three examples above, then continue to the inverted triangle for reverse outer-loop practice.

Row i has i stars — keep print("*", end="") for stars and print() for the break, and validate row counts when reading input.

💡 Best Practices

✅ Do

  • Explain outer = rows, inner = stars before coding
  • Use print("*", end="") for stars and print() after each row
  • Validate rows ≥ 1 for interactive programs
  • Wrap int(input()) in try/except ValueError
  • State O(n²) time when asked about complexity

❌ Don’t

  • Call print() inside the inner star loop
  • Use j <= rows when you meant a growing triangle
  • Skip the newline after each row
  • Ignore bad console input in user-facing demos
  • Skip the rows = 1 edge case

Key Takeaways

Knowledge Unlocked

Five things to remember about this star pattern

Print the triangle the beginner-friendly way.

5
Core concepts
02

Outer loop

Controls each row

Code
* 03

Inner loop

Prints stars with print

Code
04

print()

Ends each row

I/O
O 05

Complexity

O(n²) time

Analysis

❓ Frequently Asked Questions

The outer loop runs i from 1 to rows. For each row i, the inner loop runs j from 1 to i and prints a star with print(end=""). Row 1 prints 1 star, row 2 prints 2 stars, and so on.
You need one loop for which row you are on and another for how many characters belong on that row. Nested for loops express that directly.
print("*", end="") stays on the same line. print() ends the current line. Stars use end=""; the row break uses print() after the inner loop.
Reverse the outer loop so i runs from rows down to 1, for example for i in range(rows, 0, -1). The first line then has rows stars.
O(n²) where n is the number of rows. Total print calls equal 1+2+…+n = n(n+1)/2.
Yes. print("*" * i) prints a full row in one call. Nested loops are better for learning; "*" * i is a handy shortcut later.
Use a try/except ValueError around int(input()) or check raw_input.isdigit() before converting so bad input does not crash the script.
The outer loop never runs, so nothing is printed. Validate and prompt again if you want a clear user message.

Did you Know? 🔊

Row i prints exactly i stars. Total stars for n rows is the triangular number n(n+1)/2 — the same count that makes this pattern O(n²).

Continue to Inverted Triangle

Flip the outer loop and print an upside-down right-angled star pattern.

Program 2 tutorial →

About the author

Mari Selvan M P
Mari Selvan M P 🔗

Developer, cloud engineer, and technical writer

  • Experience 12 years building web and cloud systems
  • Focus Full Stack Development, AWS, and Developer Education

I write practical tutorials so students and working developers can learn by doing—from databases and APIs to deployment on AWS.

12 people found this page helpful
