Filled Diamond Star Pattern in C++
What You'll Learn
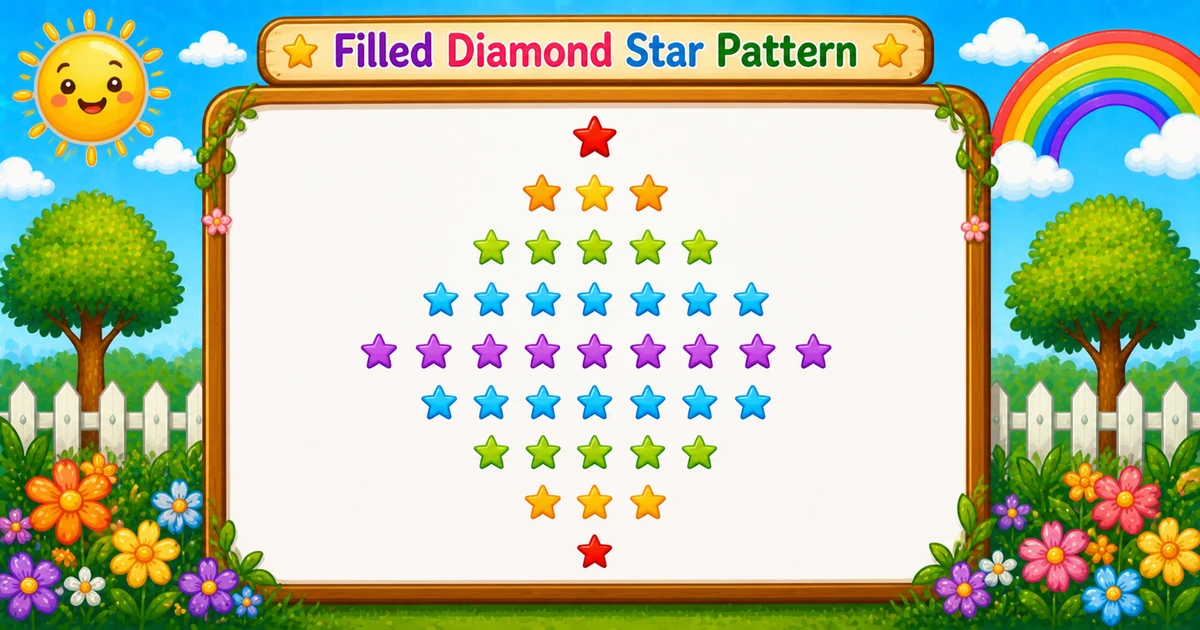
This program prints a filled diamond using two halves: the upper half increases stars by 2 each row, and the lower half decreases stars by 2, keeping the pattern centered with leading spaces.
For a given row index i, the star count is 2 * i - 1. Total output lines are 2 * rows - 1.
⭐ Pattern Output
When you run the program with rows = 5:
    *
   ***
  *****
 *******
*********
 *******
  *****
   ***
* Complete C++ Program
Fixed rows = 5 version:
#include <iostream>
using namespace std;

int main() {
    int rows = 5;
    int i, j;

    for (i = 1; i <= rows; ++i) {
        for (j = 1; j <= rows - i; ++j) cout << " ";
        for (j = 1; j <= 2 * i - 1; ++j) cout << "*";
        cout << "\n";
    }

    for (i = rows - 1; i >= 1; --i) {
        for (j = 1; j <= rows - i; ++j) cout << " ";
        for (j = 1; j <= 2 * i - 1; ++j) cout << "*";
        cout << "\n";
    }

    return 0;
}🧠 How It Works
Upper half
for (i = 1; i <= rows; ++i): for (j = 1; j <= rows - i; ++j) cout << " "; then for (j = 1; j <= 2 * i - 1; ++j) cout << "*"; — same reuse of j as the standalone pyramid.
Lower half
for (i = rows - 1; i >= 1; --i) runs the same two inner loops so odd widths step down (e.g. 7, 5, 3, 1 for rows = 5). No duplicate widest row.
Why 2 * i - 1?
Odd counts add one * on each side per row change, keeping the solid block symmetric about the vertical axis.
Newline each row
cout << "\n" after both inner loops in each half. Total lines = 2*rows - 1; each line length follows (rows-i)+(2i-1).
Filled diamond
O(rows²) character writes, O(1) extra space. Widest rows scroll inside the touch-friendly green glyph on mobile.
Variation — User Input Version
Accept rows with cin:
#include <iostream>
using namespace std;

int main() {
    int rows;
    int i, j;

    cout << "Enter the number of rows: ";
    cin >> rows;

    for (i = 1; i <= rows; ++i) {
        for (j = 1; j <= rows - i; ++j) cout << " ";
        for (j = 1; j <= 2 * i - 1; ++j) cout << "*";
        cout << "\n";
    }

    for (i = rows - 1; i >= 1; --i) {
        for (j = 1; j <= rows - i; ++j) cout << " ";
        for (j = 1; j <= 2 * i - 1; ++j) cout << "*";
        cout << "\n";
    }

    return 0;
}💡 Tips for Enhancement
Try These
- Validate
rows >= 1after reading withcin - For a hollow diamond, use Program 9 (diagonal
j/klogic)—not a one-line tweak of the star loop - Print only the first outer loop to get Program 5’s pyramid alone
- Swap characters or print row numbers inside the star run
- Insert spaces between
*characters for a looser diamond
Avoid
- Starting the second outer loop at
i == rows—duplicate widest row - Confusing this with Program 9: hollow diamonds need fixed width
2 * rows - 1per line and different inner logic - Using
istars instead of2 * i - 1—breaks centered symmetry
Key Takeaways
Upper half = Program 5; lower half = same inners with i from rows - 1 to 1.
Stars per row: 2 * i - 1; leading spaces: rows - i.
Widest row has 2 * rows - 1 stars; tip rows are shorter (no fixed line width).
Total lines: 2 * rows - 1.
Time complexity O(n²) for n = rows.
❓ Frequently Asked Questions
i and prints wider star runs each time. The second loop shrinks i and reuses the same space and star formulas, closing the diamond.2 * rows - 1 stars is already printed when i == rows in the first loop. Continuing from rows - 1 avoids printing that line twice.*. Program 9 only places stars on two diagonals and pads each line to length 2 * rows - 1.n rows: about 2n - 1 lines, each with Θ(n) printing work in the two inner loops.Next: V Hollow in Box
Continue to Program 11 for a V-shaped hollow pattern inside a box.
If you replace the star loop with diagonal checks (like Program 9), you can convert this filled diamond into a hollow diamond outline.
About the author

10 people found this page helpful