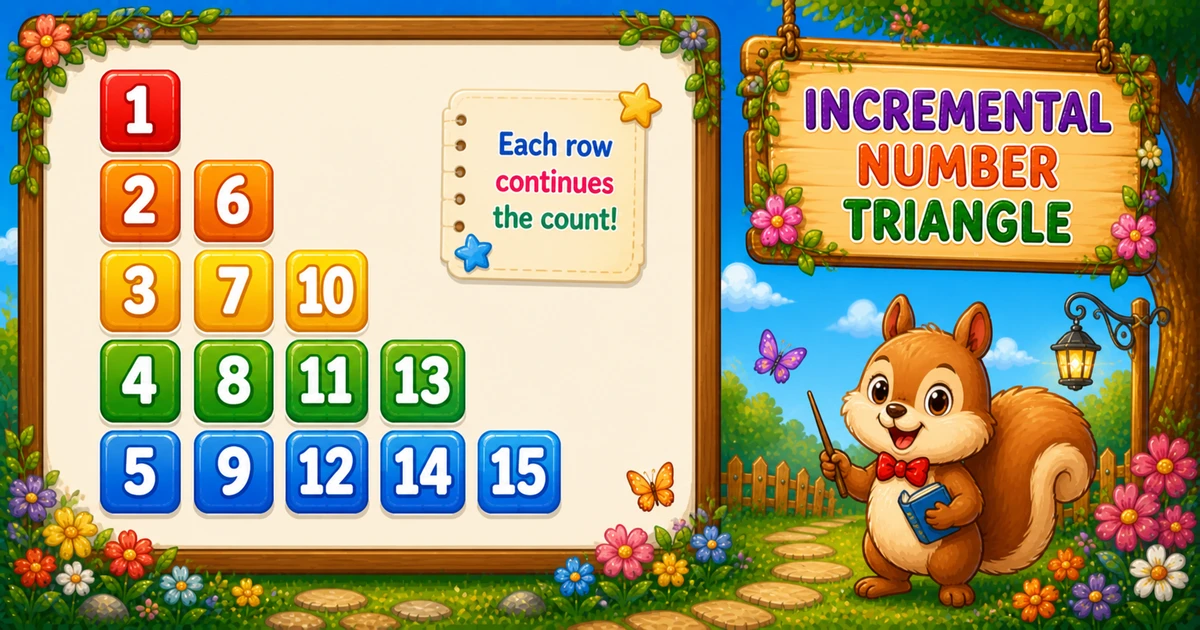
A column-wise number triangle fills a 2D list down each column with increasing numbers, then prints row by row. That fill order creates jumps like 2 6 and 3 7 10 instead of consecutive digits.
In Python use a 2D list tri = [[0] * (rows + 1) for _ in range(rows + 1)], fill with col outer, then print with row outer using print(..., end="") and a bare print().
Approach
How to Solve It
Store values in a 2D list so fill order and print order can differ. Fill with col outer; print with row outer.
Method
Idea
Best for
2D list + column fill
Fill col outer, print row outer
Learning, interviews, exams
Rows input
Same logic with a user-chosen height
Practice / demos
Pseudocode
Pseudocode
create tri[rows+1][rows+1]
num = 1
for col from 1 to rows:
    for row from col to rows:
        tri[row][col] = num
        num = num + 1
for row from 1 to rows:
    for col from 1 to row:
        print tri[row][col] (space between values)
    print newline
Cheat sheet
Goal
Pattern
Store cells
tri = [[0] * (rows + 1) for _ in range(rows + 1)]
Fill column-wise
for col in range(1, rows + 1): for row in range(col, rows + 1):
Print row-wise
for row in range(1, rows + 1): for col in range(1, row + 1):
Space between
if col < row: print(" ", end="")
Total cells
rows * (rows + 1) // 2
Printing Numbers vs Starting a New Line
API
Effect
Use for
print(..., end="")
Stays on the same line
Each cell value and spaces between cells
print()
Ends the current line
After each printed row
Cells use end=""; a bare print() ends the row once.
Try it
Live Preview
Change the row count and the column-wise triangle updates instantly — capped at 9 for readable demos.
Whole numbers from 1 to 9. Tap a chip or type a value — the preview redraws as you go.
Live resultrows = 5 · 15 cells
1
2 6
3 7 10
4 8 11 13
5 9 12 14 15
Trace
Worked Walkthrough — Fill for rows = 5
Trace how column-wise fill produces the jumps you see when printing row 2 and row 3.
Three complete programs: fixed rows = 5, user-input rows, and a compact rows = 3 demo. Use View Output for sample results.
Example 1 — Fixed rows = 5
Hard-coded height — fill with col outer, then print with row outer.
Python
rows = 5
tri = [[0] * (rows + 1) for _ in range(rows + 1)]
num = 1

for col in range(1, rows + 1):
    for row in range(col, rows + 1):
        tri[row][col] = num
        num += 1

for row in range(1, rows + 1):
    for col in range(1, row + 1):
        print(tri[row][col], end="")
        if col < row:
            print(" ", end="")
    print()
Output
1
2 6
3 7 10
4 8 11 13
5 9 12 14 15
How It Works
1. Fill column-wise. Column 1 gets 1–5; column 2 gets 6–9; column 3 gets 10–12; and so on.
3. Spaces. Print a space between cells with if col < row, then bare print() after each row.
Example 2 — User Input (rows)
Read the row count, build the 2D list, and run the same fill/print logic.
Python
try:
    rows = int(input("Enter the number of rows: "))
except ValueError:
    print("Please enter a positive whole number.")
    raise SystemExit

if rows < 1:
    print("Please enter a positive whole number.")
    raise SystemExit

tri = [[0] * (rows + 1) for _ in range(rows + 1)]
num = 1

for col in range(1, rows + 1):
    for row in range(col, rows + 1):
        tri[row][col] = num
        num += 1

for row in range(1, rows + 1):
    for col in range(1, row + 1):
        print(tri[row][col], end="")
        if col < row:
            print(" ", end="")
    print()
Output (when user enters 4)
Enter the number of rows: 4
1
2 5
3 6 8
4 7 9 10
How It Works
1. Validate rows. Catch ValueError; require rows >= 1 before building the list.
2. Same core. Fill and print logic matches Example 1 — only rows comes from the user.
3. Readable demos. Cap practice runs at rows ≤ 9 so the console stays easy to scan.
Example 3 — Compact rows = 3
Same fill/print structure with only six cells — easy to trace on paper.
Python
rows = 3
tri = [[0] * (rows + 1) for _ in range(rows + 1)]
num = 1

for col in range(1, rows + 1):
    for row in range(col, rows + 1):
        tri[row][col] = num
        num += 1

for row in range(1, rows + 1):
    for col in range(1, row + 1):
        print(tri[row][col], end="")
        if col < row:
            print(" ", end="")
    print()
2. Trace on paper. Confirm row 2 prints 2 4 — not consecutive — because of column-wise fill.
Edge Cases & Pitfalls
Check these before calling the solution done.
row outer fill
Consecutive instead of jumps
If you fill with row outer, you get 1, 2 3, 4 5 6… Keep col outer for the column-wise pattern.
0-based mix
Off-by-one indexing
These demos use 1-based tri[row][col]. Mixing 0-based loops with 1-based storage leaves holes or overwrites.
row = 1..rows fill
Upper triangle unused
During fill, start at row = col, not row = 1 — cells above the diagonal are never printed.
bare print()
Broken rows
If bare print() sits inside the print inner loop, each value lands on its own line. Call it only after the row finishes.
rows = 1
Single cell
Output is just 1 — a good sanity check for input validation.
Bad input
int(input()) throws
Wrap with try/except ValueError so non-numeric input does not crash before the list is created.
Analysis
Time and Space Complexity
Program
Time
Extra space
Fixed / compact (Examples 1, 3)
O(n²)
O(n²) list
User input (Example 2)
O(n²)
O(n²) list
Fill and print each touch n(n+1)/2 cells. The 2D list uses O(n²) space (only the lower triangle is used).
Remember
Key Takeaways
Fill ≠ print: column-wise fill creates the jumps; row-wise print shows the triangle.
Fill bound: for each col, assign row = col..rows with num += 1.
print vs print(): values and spaces use end=""; bare print() advances after each row.
Next step: Program 56 prints a centered palindromic number pyramid.
One line: fill tri[row][col] = num column-wise, then print tri[row][col] row-wise.
Frequently Asked Questions
Because the triangle is filled column-wise: after finishing column 1 (1..5), the next available number is 6 for column 2.
Column-wise filling creates the distinctive jumps (6, 10, 13). Row-wise printing displays the familiar triangle shape.
For rows=5: 1; 2 6; 3 7 10; 4 8 11 13; 5 9 12 14 15 — numbers increase within each column during fill.
Program 54 uses diagonal conditions with spaces. Program 55 uses a 2D list filled column-wise then printed row-wise.
Not strictly, but it keeps fill order and print order separate — much clearer for beginners.
Yes. Loop rows first and you get the standard 1, 2 3, 4 5 6 triangle — compare both approaches.
O(n²) for n rows because total filled/printed values equal n(n+1)/2.
For rows=n, the largest number is n(n+1)/2 — the triangular number of cells.
Use try/except ValueError around int(input()) so bad input does not crash the script.
One row prints a single 1 — fill and print loops each run once.
🤔
Did you know?
Numbers are filled column-wise into a 2D list — column 1 gets 1..n, column 2 gets the next block, and so on — then printed row-wise. Total values = n(n+1)/2, so O(n²).