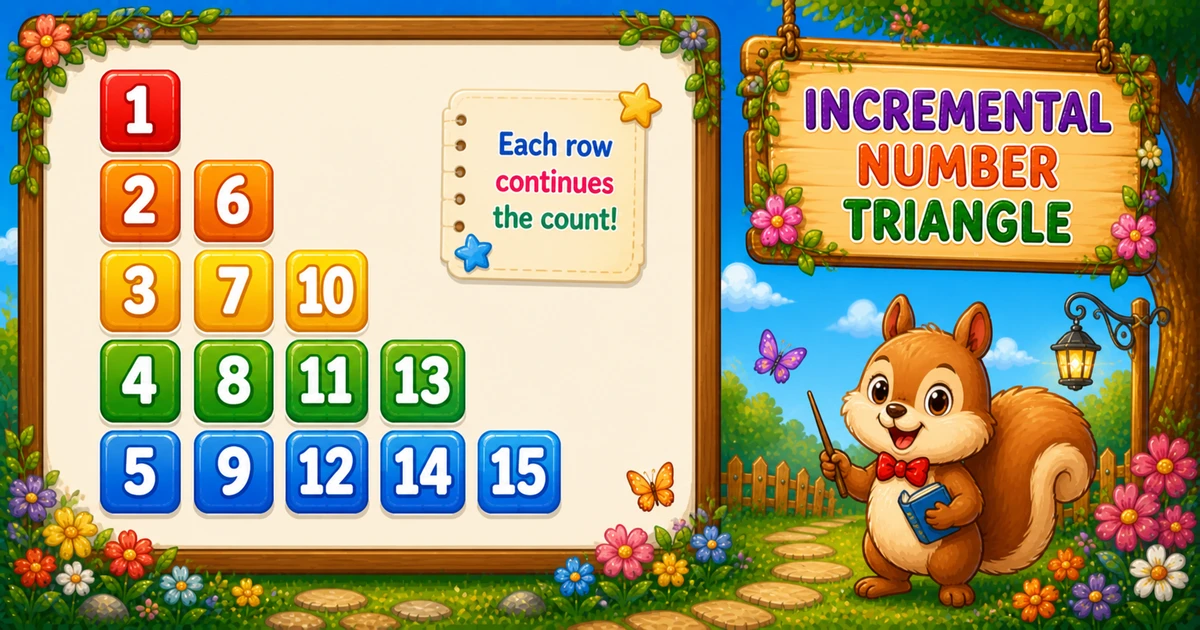
A column-wise number triangle fills a 2D array down each column first (column 1 gets 1..n, column 2 gets the next block, …), then prints row by row. With rows = 5 you get jumps like 2 6 and 3 7 10 instead of consecutive digits.
Unlike Program 54 (diagonal spaces), this shape stores values in a triangle array so fill order and print order can differ.
Approach
How to Solve It
Fill with col outer and row = col..rows inner. Print with row outer and col = 1..row inner.
Method
Idea
Best for
2D array
Fill column-wise, print row-wise
Learning, interviews, demos
Compact trace
Same logic with rows = 3
Quick dry-runs on paper
Pseudocode
Pseudocode
num = 1
for col from 1 to rows:
    for row from col to rows:
        tri[row][col] = num
        num = num + 1

for row from 1 to rows:
    for col from 1 to row:
        print tri[row][col]
    print newline
Cheat sheet
Goal
Pattern
Storage
int tri[6][6]; (or larger fixed size)
Fill column-wise
for (col = 1; col <= rows; col++) for (row = col; row <= rows; row++) tri[row][col] = num++;
Print row-wise
for (row = 1; row <= rows; row++) for (col = 1; col <= row; col++)
Space between
if (col < row) cout << " ";
End the row
cout << "\n";
Largest value
rows * (rows + 1) / 2
Printing Numbers vs Starting a New Line
API
Effect
Use for
cout << tri[row][col]
Stays on the same line
Each value
cout << " " / cout << "\n"
Space between values / ends the line
Between cells / after the print loop
Print values without a newline, then end the row once. Put the space only between values (col < row), not after the last one.
Try it
Live Preview
Change the row count and the column-wise triangle updates instantly.
Use rows from 1 to 10. Tap a chip or type a value — the preview redraws as you go.
Live result5 rows · 15 cells
1
2 6
3 7 10
4 8 11 13
5 9 12 14 15
Trace
Worked Walkthrough
Trace the fill for rows = 5, then see how row 2 prints 2 6.
Column
Rows filled
Values stored
1
1..5
1 2 3 4 5
2
2..5
6 7 8 9
3
3..5
10 11 12
Print row 2
tri[2][1], tri[2][2]
2 6
Fill order and print order are different on purpose — that is what creates the jumps.
Code
C++ Programs
Three complete programs: fixed rows = 5, cin input, and a compact rows = 3 demo. Use View Output to reveal sample results.
Example 1 — Fixed rows = 5
Hard-coded height — fill column-wise into a 2D array, then print row-wise.
C++
#include <iostream>
using namespace std;

int main()
{
    int rows = 5;
    int tri[6][6];
    int col, row, num = 1;

    for (col = 1; col <= rows; col++)
        for (row = col; row <= rows; row++)
            tri[row][col] = num++;

    for (row = 1; row <= rows; row++)
    {
        for (col = 1; col <= row; col++)
        {
            cout << tri[row][col];
            if (col < row)
                cout << " ";
        }
        cout << "\n";
    }

    return 0;
}
Output
1
2 6
3 7 10
4 8 11 13
5 9 12 14 15
How It Works
1. Fill column by column. Outer col, inner row = col..rows stores num++ into tri[row][col].
2. Print row by row. Outer row, inner col = 1..row reads the stored values left to right.
3. Spaces between values. Print a space only when col < row, then end the line with "\n".
Example 2 — User Input Rows
Read the row count at runtime into a fixed-size array (max 15).
C++
#include <iostream>
using namespace std;

int main()
{
    int rows, col, row, num = 1;
    int tri[16][16];

    cout << "Enter the number of rows: ";
    cin >> rows;

    for (col = 1; col <= rows; col++)
        for (row = col; row <= rows; row++)
            tri[row][col] = num++;

    for (row = 1; row <= rows; row++)
    {
        for (col = 1; col <= row; col++)
        {
            cout << tri[row][col];
            if (col < row)
                cout << " ";
        }
        cout << "\n";
    }

    return 0;
}
Output (when user enters 4)
Enter the number of rows: 4
1
2 5
3 6 8
4 7 9 10
How It Works
1. Same fill/print core. Only the source of rows changes from a literal to cin.
2. Entering 4 stops early. You get four rows ending at 4 7 9 10.
3. Validate in real apps. Prefer checking cin failure and capping rows to the array size (tip below).
Safer input tip
if (!(cin >> rows) || rows < 1 || rows > 15)
{
    cout << "Please enter an integer from 1 to 15.\n";
    return 1;
}
Example 3 — Compact rows = 3
Smaller height for quick tracing of fill order vs print order.
C++
#include <iostream>
using namespace std;

int main()
{
    int rows = 3;
    int tri[4][4];
    int col, row, num = 1;

    for (col = 1; col <= rows; col++)
        for (row = col; row <= rows; row++)
            tri[row][col] = num++;

    for (row = 1; row <= rows; row++)
    {
        for (col = 1; col <= row; col++)
        {
            cout << tri[row][col];
            if (col < row)
                cout << " ";
        }
        cout << "\n";
    }

    return 0;
}
Output
1
2 4
3 5 6
How It Works
1. Only three rows. Easy to dry-run every tri[row][col] = num++ assignment on paper.
2. Same formula. Nothing changes except rows — proving the pattern scales.
3. Jump still appears. Row 2 prints 2 4 — column 1 then column 2 of that row.
Edge Cases & Pitfalls
Check these before calling the solution done.
Fill order
Keep col outer during fill
Swapping to row-outer fill produces consecutive digits (1, 2 3, 4 5 6) — a different pattern.
Indexing
Use 1-based indices as written
This demo stores at tri[row][col] with both starting at 1. Size the array as at least [rows+1][rows+1].
Spaces
Space only between values
Use if (col < row) so the last value on a row has no trailing space.
Bad cin
Validate input and array bounds
Check cin >> rows and require 1 <= rows <= your declared max size.
Analysis
Time and Space Complexity
Program
Time
Extra space
Fill + print (Examples 1–3)
O(n²)
O(n²) for the array
Total cells are n(n + 1) / 2 — quadratic in n. The 2D array uses O(n²) space; a streaming formula can avoid the array if needed.
Remember
Key Takeaways
Rule: fill column-wise with num++, then print row-wise.
Jumps are expected: row 2 shows 2 6 because those cells belong to different columns.
Break the row: call cout << "\n" only after the print loop finishes.
Complexity:O(n²) time; O(n²) array space.
One line: fill the triangle down each column, then print each row left to right.
Frequently Asked Questions
Because the triangle is filled column-wise: after finishing column 1 (1..5), the next available number is 6 for column 2.
Column-wise filling creates the distinctive jumps (6, 10, 13). Row-wise printing displays the familiar triangle shape.
For rows=5: 1; 2 6; 3 7 10; 4 8 11 13; 5 9 12 14 15 — numbers increase within each column during fill.
Program 54 uses diagonal conditions with spaces. Program 55 uses a 2D array filled column-wise then printed row-wise.
Not strictly, but it keeps fill order and print order separate — much clearer for beginners.
Printing a number (and optional space) stays on the same line. Printing a newline ends the current row. Values use cout without a newline; the row break uses cout << "\n" after the print loop.
O(n²) for n rows because total filled/printed values equal n(n+1)/2.
For rows=n, the largest number is n(n+1)/2 — the triangular number of cells.
🤔
Did you know?
Numbers are filled column-wise into a 2D array — column 1 gets 1..n, column 2 gets the next block, and so on — then printed row-wise. Total values = n(n+1)/2, so time is O(n²).