PuTTY — SSH into EC2 (Windows)

What you’ll learn
PuTTY is a common Windows SSH client. With an EC2 instance, a stable public IPv4 (recommended), and a private key, you can open an interactive shell on your Linux instance.
This guide walks through reading the hostname and default user from the EC2 Connect panel, configuring PuTTY with a .ppk key, saving a session, and completing the first login.
EC2 and PuTTY at a glance
- PuTTY — free SSH client for Windows (and components such as PuTTYgen for key conversion).
- Amazon EC2 — virtual Linux servers in the cloud. SSH uses TCP port 22 with key-based authentication for official AMIs.
Prerequisites
- PuTTY installed from the official site: PuTTY download (includes PuTTYgen).
- A running EC2 instance and its public IPv4 DNS or address (see below).
- A matching .ppk private key, or a .pem you convert with PuTTYgen (see callout).
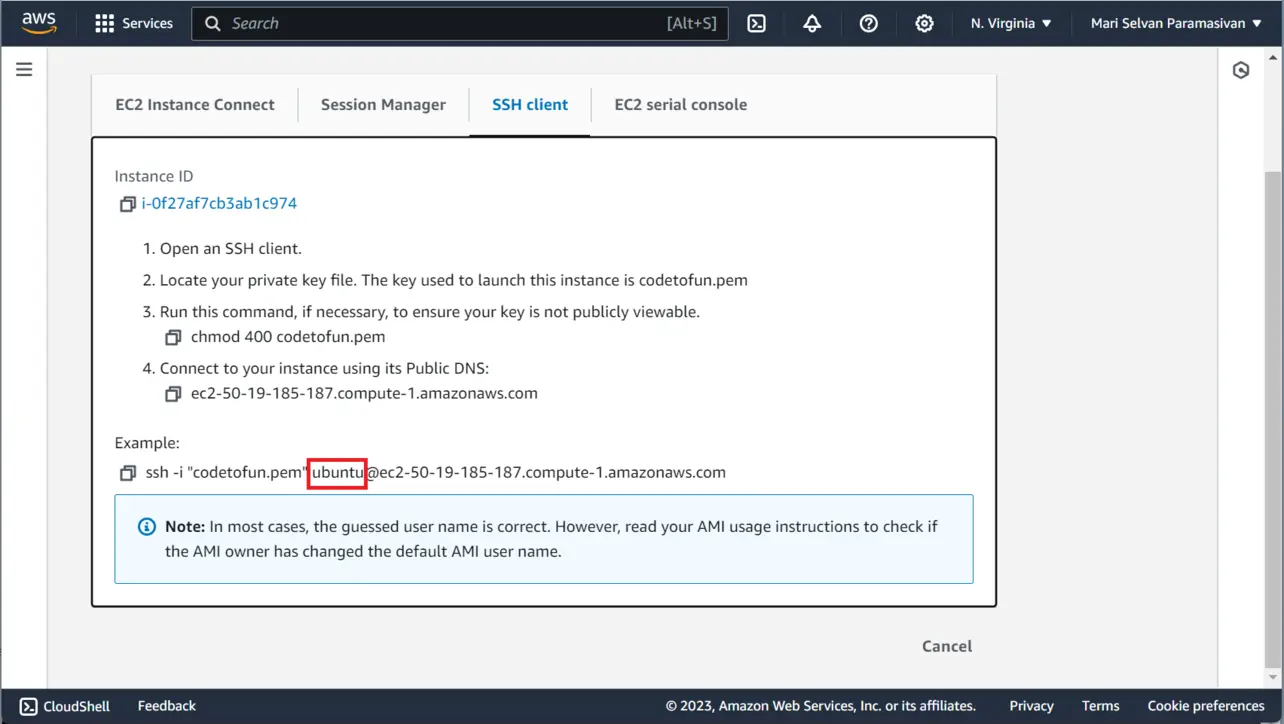
ec2-user— many Amazon Linux AMIs.ubuntu— official Ubuntu Server AMIs.
Configure PuTTY and connect
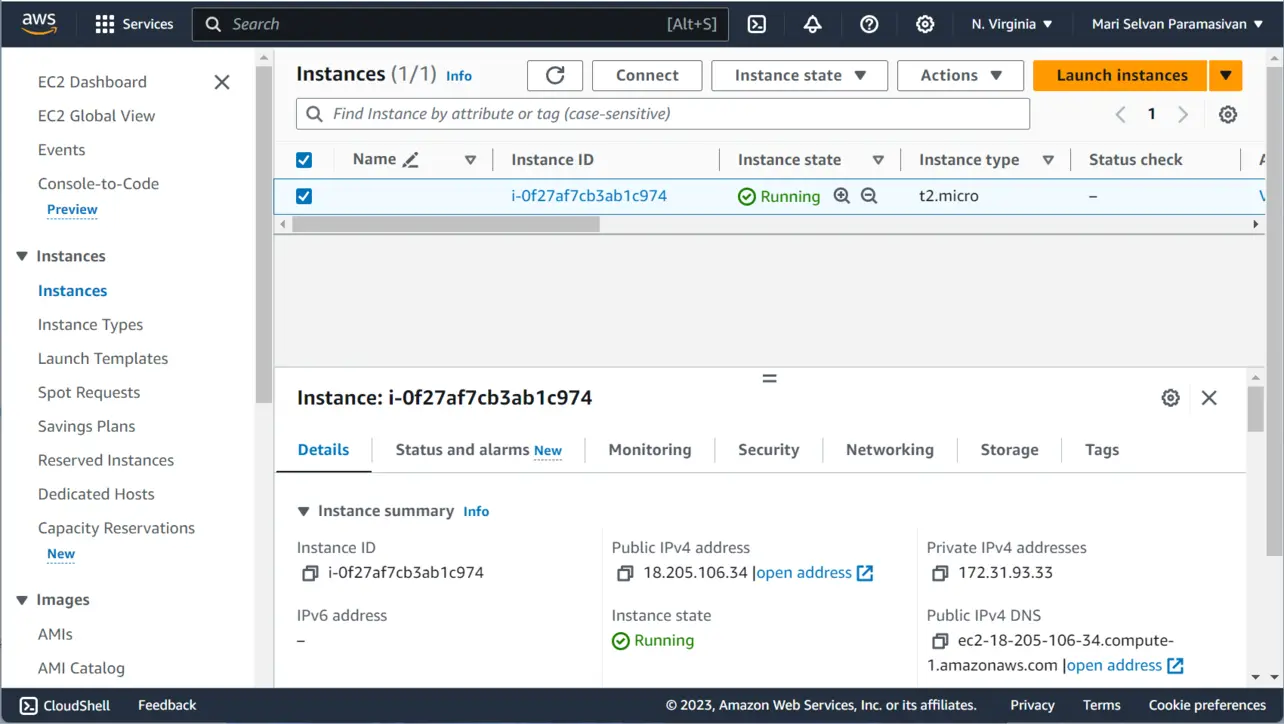
Gather the hostname and username from the console first so you can paste them into PuTTY without guesswork.
In the EC2 console, open Instances, select your instance, choose Connect, then the SSH client tab. Copy the hostname shown for the example
sshcommand (public DNS or IP).- Instances → select instance → Connect
- Open the SSH client tab
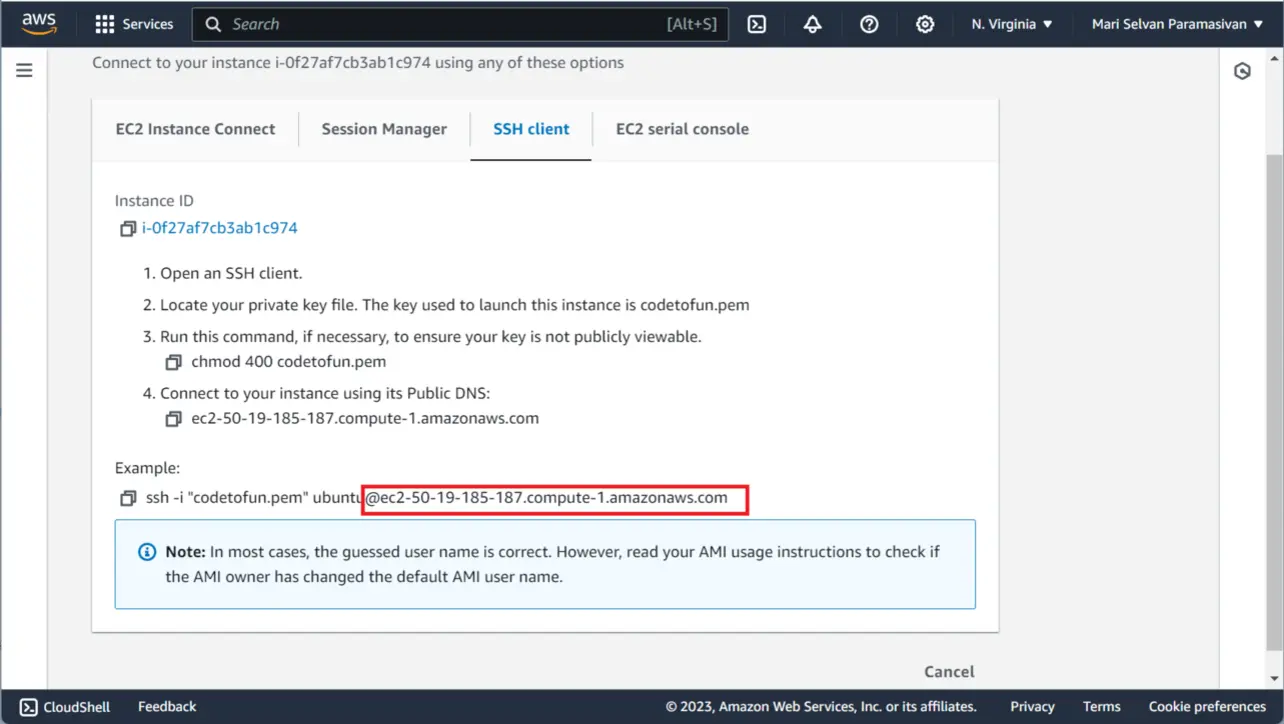
Amazon EC2 On the same tab, note the username in the sample SSH command (for example
ubuntuorec2-user).- Instances → select instance → Connect → SSH client
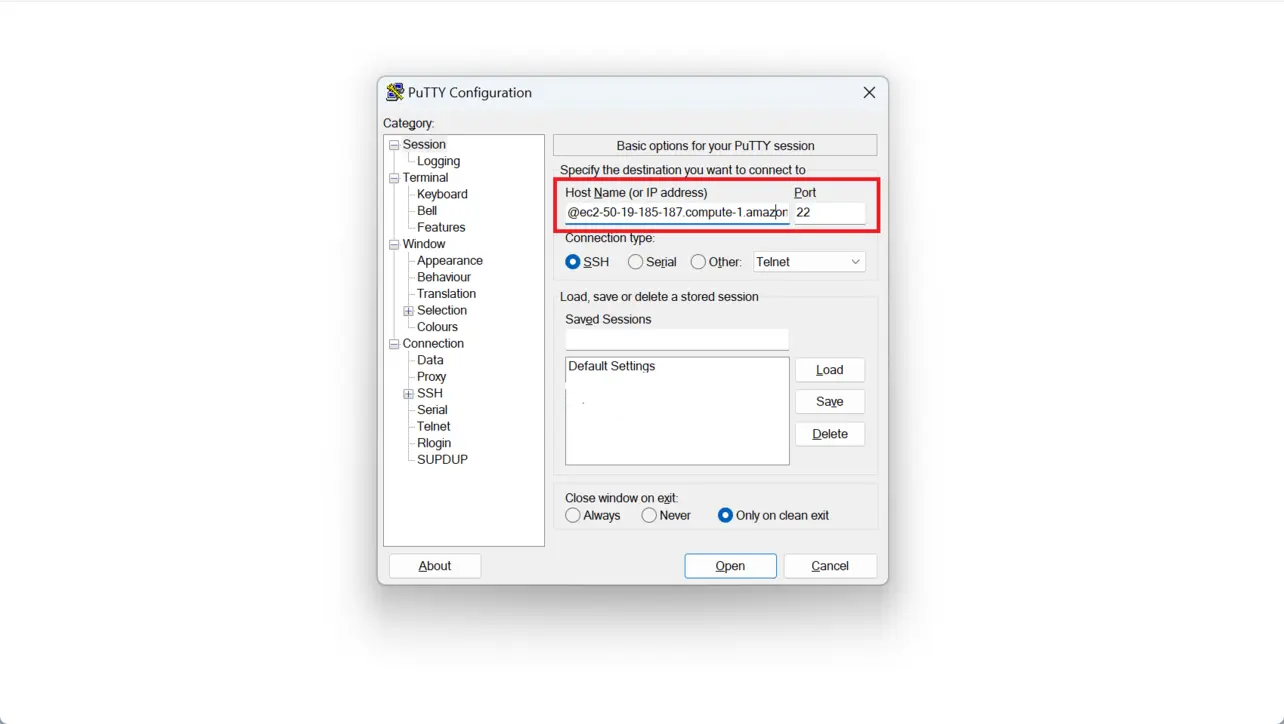
Amazon EC2 Open PuTTY. On the Session screen, set Host Name (or IP address) to the value you copied (port 22).
PuTTY In the category tree, go to Connection → SSH → Auth → Credentials (in older versions, Auth or Auth / Credentials). Under Private key file for authentication, browse to your
.ppkfile.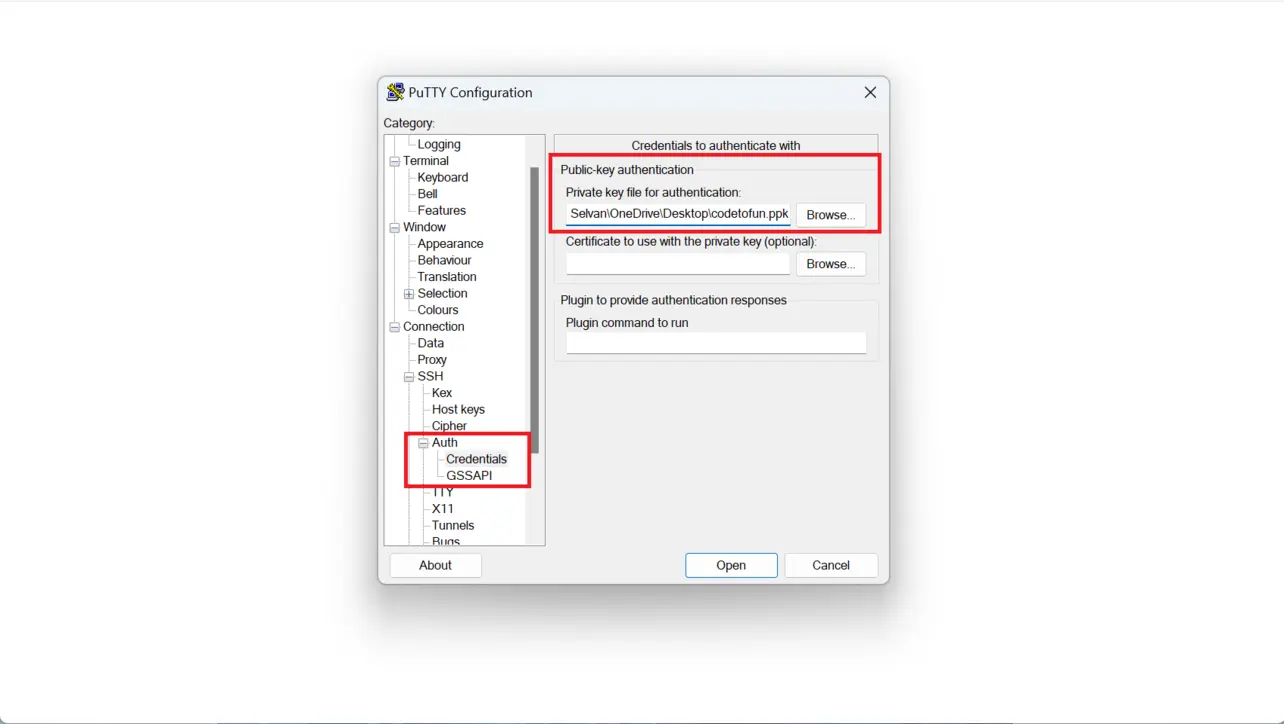
PuTTY Return to Session, type a name under Saved Sessions, and choose Save so you can reopen these settings later.
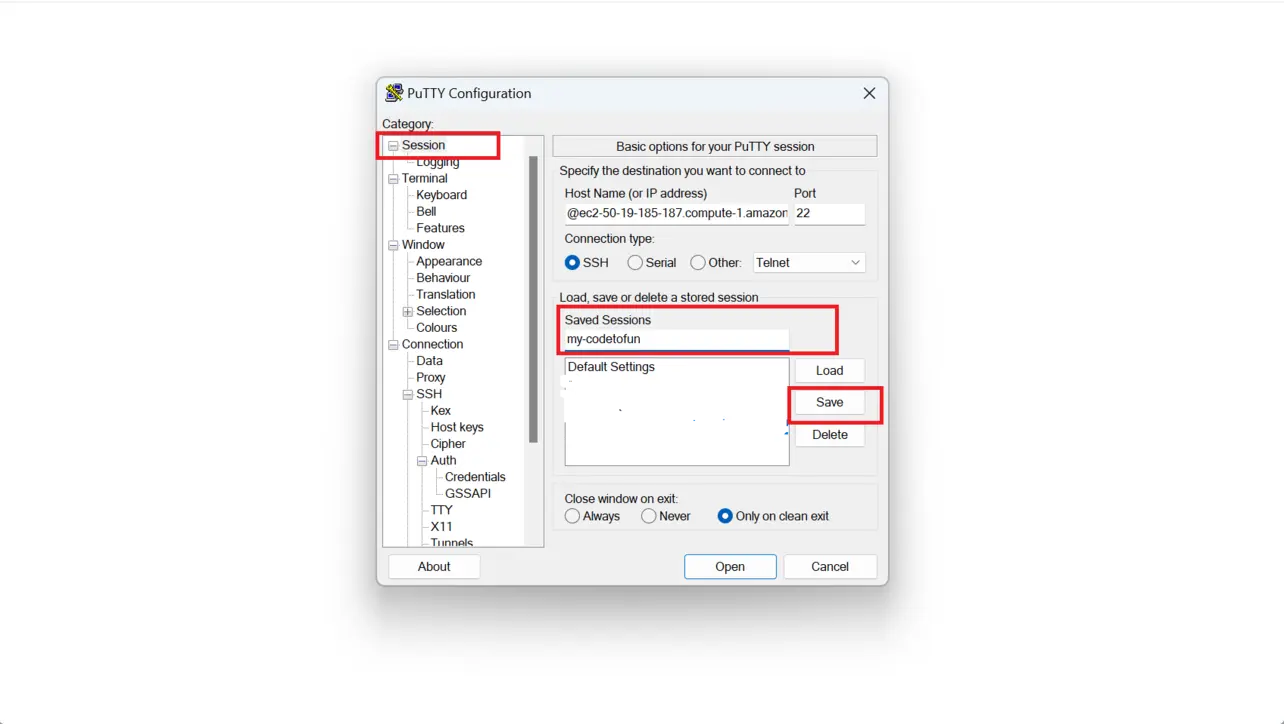
PuTTY Select your saved session and choose Open to start SSH.
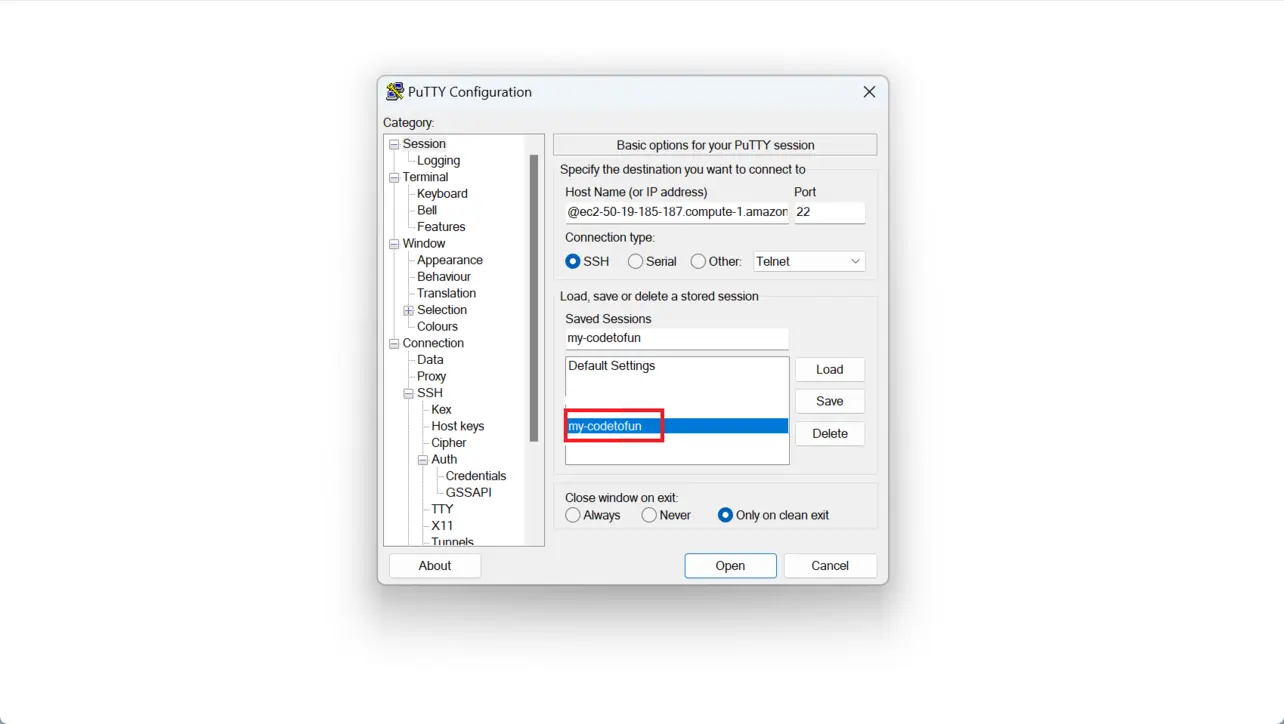
PuTTY On first connect, PuTTY shows a host key prompt. Verify the fingerprint against the EC2 console if you need high assurance, then choose Accept to cache the key.
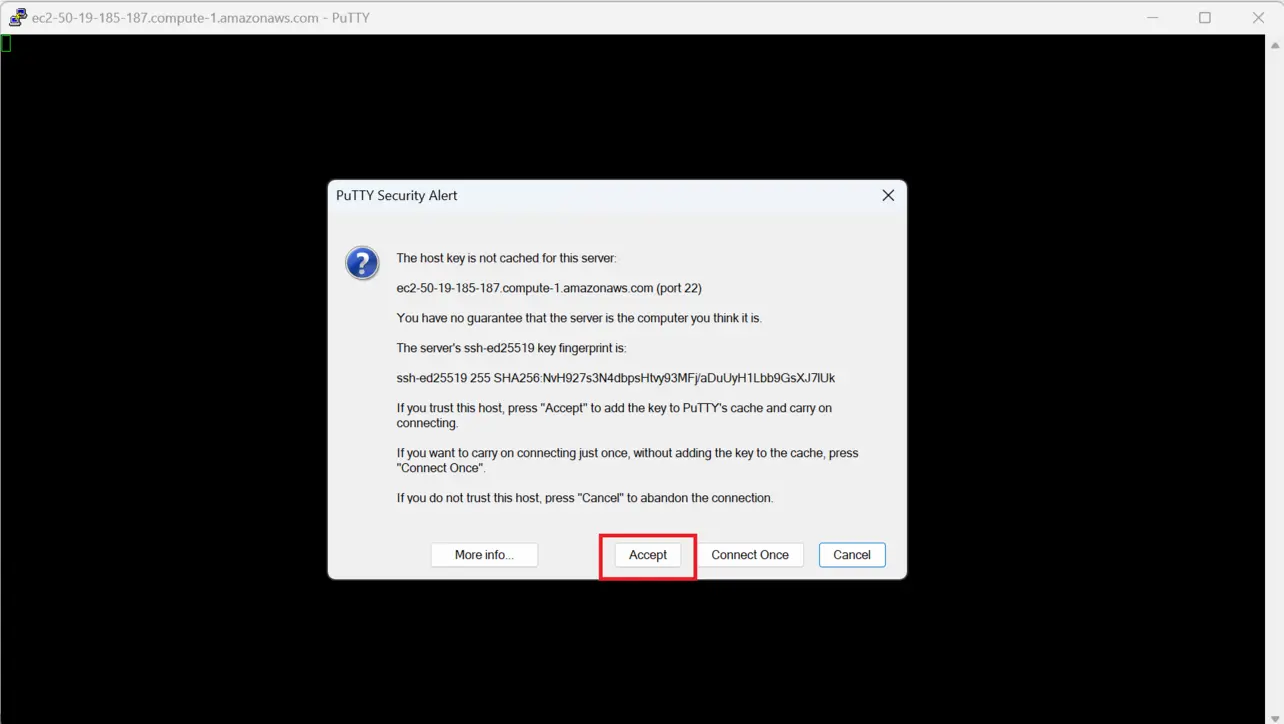
PuTTY At the
login as:prompt, type the username from the EC2 Connect tab (for exampleubuntu). With key auth configured, you should land in a shell without a password.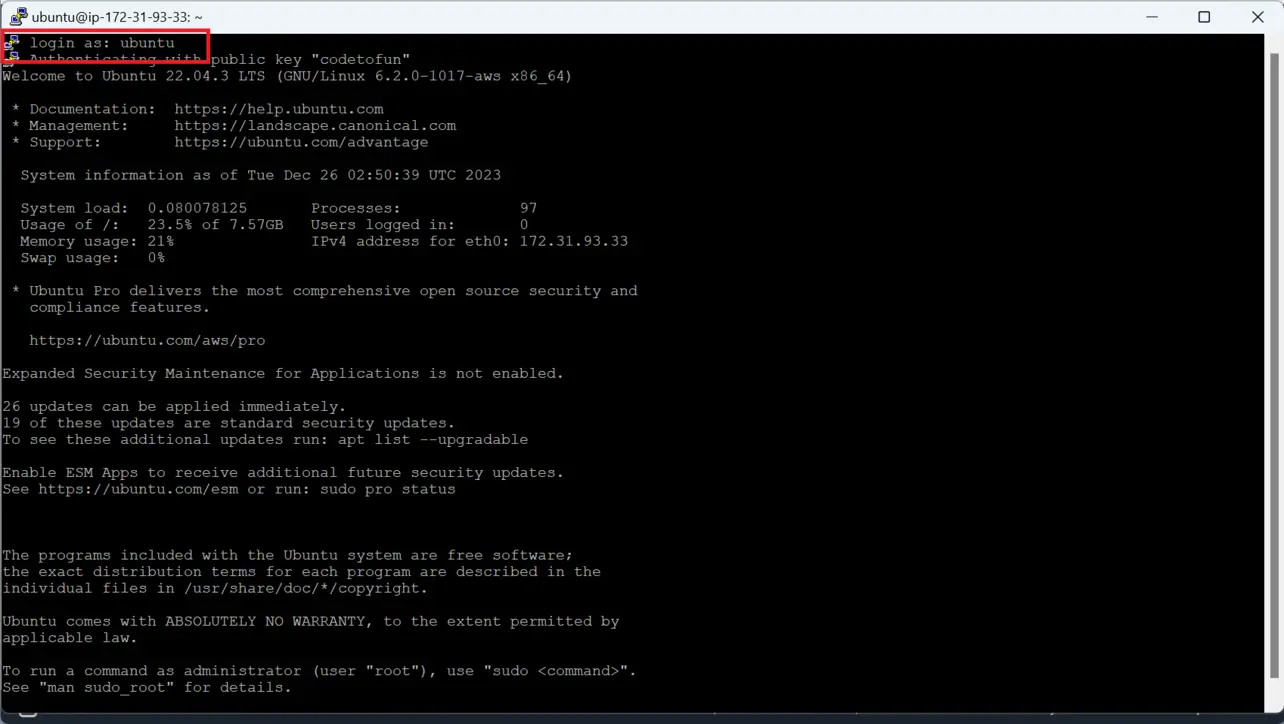
PuTTY
You now have an SSH session on the instance. Next, you can use the same host, user, and key material for SFTP in FileZilla if you upload files graphically.
Troubleshooting
- Connection refused / timeout — confirm the instance is running, has a public route, and the security group allows inbound TCP 22 from your IP.
- Server refused our key — wrong private key, wrong username for the AMI, or key not loaded under SSH → Auth / Credentials.
- No supported authentication methods — ensure you are using the key that matches the public key on the instance and that the image expects key auth (not password-only).
Key takeaways
Copy hostname and username from EC2 Connect → SSH client before filling PuTTY.
Load a .ppk under SSH → Auth / Credentials; convert .pem with PuTTYgen when needed.
Save a named session so you do not re-enter settings for every connection.
Frequently asked questions
ssh -i key.pem ubuntu@host. PuTTY is one convenient option on Windows, especially with .ppk keys.Next: Node.js on the instance
Use the same SSH session to run apt, install npm, and upgrade to a supported Node line with n.
Modern Windows 10 and 11 include OpenSSH Client (ssh in PowerShell or Terminal). PuTTY remains useful when you prefer its session manager, .ppk keys, or jump-host workflows built around the classic toolkit.
About the author


8 people found this page helpful