Application Load Balancer — create in the console

What you’ll learn
An Application Load Balancer (ALB) sits in front of your application targets and spreads HTTP and HTTPS traffic at Layer 7. This guide is the short console path: create an internet-facing ALB, add an HTTP listener on port 80, and forward to a target group you already prepared.
For concepts, listeners, and security groups in more depth, read the Application Load Balancer overview first.
What is a load balancer?
A load balancer distributes incoming connections or requests across multiple backend targets so you can scale out capacity and survive individual instance failures without taking the whole service offline.
Why use a load balancer?
Load balancers increase capacity and availability: health checks can stop sending traffic to unhealthy targets, and you can add or replace instances behind the same stable DNS name. They also centralise TLS termination and routing rules when you use Layer 7 products such as an ALB.
What is an Application Load Balancer?
An Application Load Balancer makes routing decisions for HTTP and HTTPS. It supports host- and path-based rules, multiple listeners, and integration with AWS services such as EC2, IP targets, and Lambda (per current AWS documentation for your Region).
Create an Application Load Balancer
Open the EC2 console, expand Load Balancing in the left navigation, and choose Load Balancers. The exact layout can change over time; the screenshots illustrate the intended flow.
Choose Create load balancer.
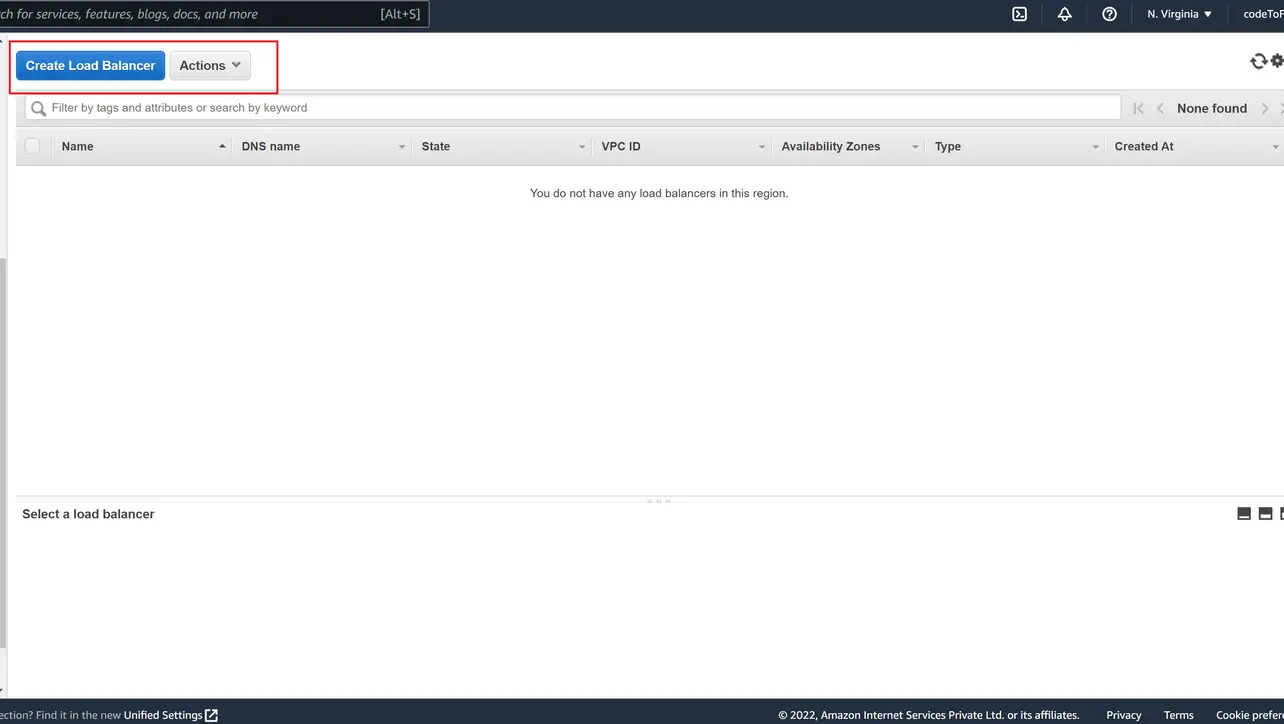
Amazon EC2 Under Application Load Balancer, choose Create (skip Classic Load Balancer for new designs; use Network Load Balancer only when you need Layer 4 behaviour).

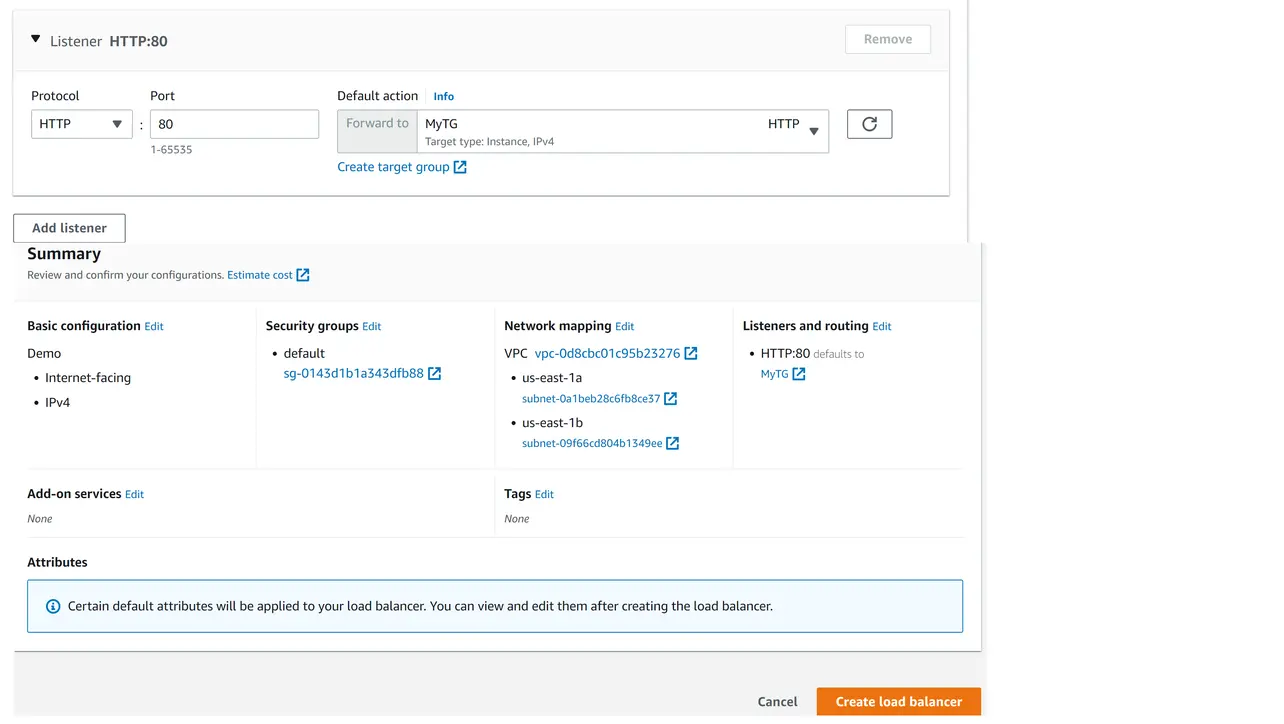
Elastic Load Balancing Complete the wizard: name the load balancer, pick an internet-facing scheme (unless you intentionally need internal-only), choose at least two subnets in different Availability Zones, attach security groups that allow client traffic to the listener ports, and add a listener on HTTP port 80 that forwards to your target group. Review and choose Create load balancer.
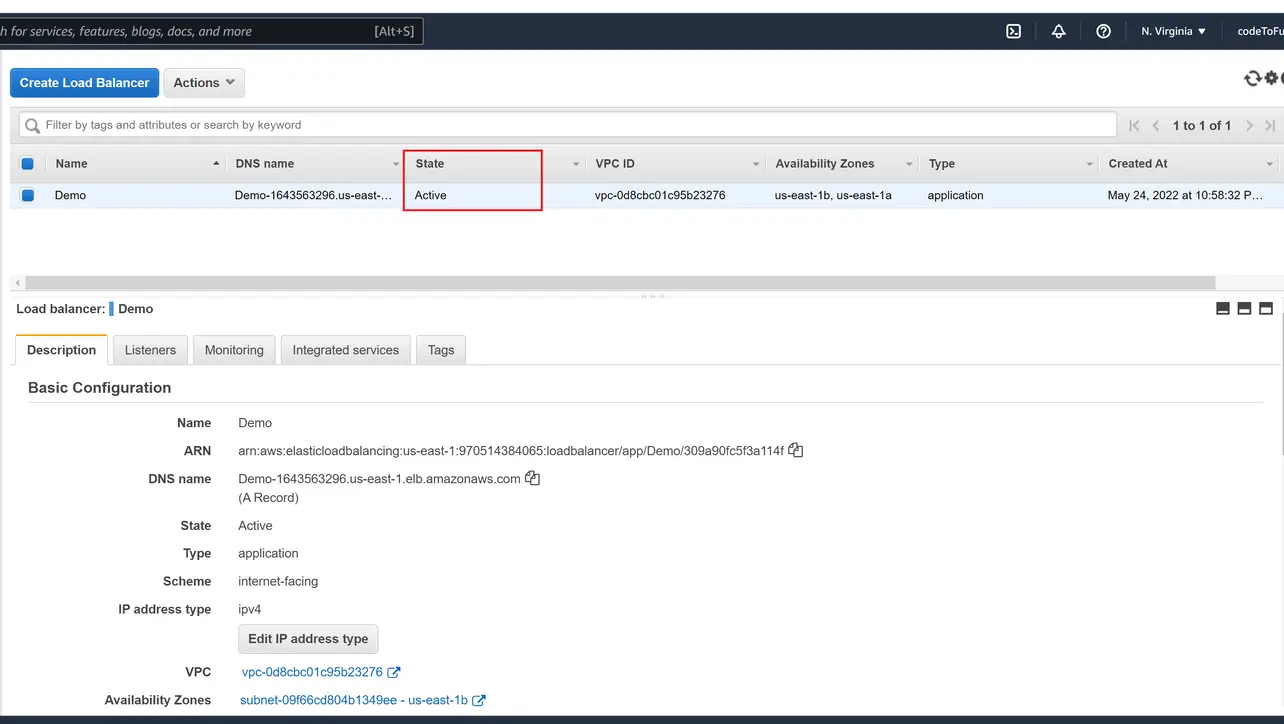
Elastic Load Balancing Wait until the state is active. Copy the DNS name of the load balancer for tests and for Route 53 alias records.
Elastic Load Balancing
Point traffic at the load balancer
When you update the A (and AAAA if you use IPv6) alias records in your Route 53 hosted zone to the ALB DNS name, clients resolve your domain to the load balancer instead of individual instances. Test with the raw ALB DNS name first, then switch production DNS during a planned window.
- Confirm target health is healthy before relying on DNS cutover.
- Add an HTTPS listener on port 443 with an ACM certificate when you are ready for TLS.
Key takeaways
Pick Application Load Balancer for HTTP/HTTPS routing and host or path rules.
Attach listeners to target groups with passing health checks before you send real users.
Use the ALB DNS name (or Route 53 alias) as the stable front door in front of your fleet.
Frequently asked questions
Next: target groups in depth
Register EC2 instances, interpret pending state, and see how listener rules attach to your target groups before you publish DNS.
An internet-facing ALB needs subnets in at least two Availability Zones. Point Route 53 alias records at the load balancer DNS name when you are ready to send production traffic through the ALB instead of directly to instances.
About the author


8 people found this page helpful