Amazon EC2 — launch an instance

What you’ll learn
Amazon Elastic Compute Cloud (EC2) provides virtual servers in the cloud. Launching an instance is the first step before you install runtimes, deploy apps, or attach load balancers.
This guide uses the AWS Management Console to start an Ubuntu Server instance with a login key pair and network rules for SSH and basic web traffic.
Prerequisites
Before you begin, ensure you have the following:
- AWS account — active account with rights to create EC2 instances and key pairs. You can sign up for AWS if needed.
- Console access — ability to sign in to the AWS Management Console.
Launch an EC2 instance
After you sign in to the console, follow these steps. Labels in the wizard can change slightly over time; use the screenshots as a visual anchor.
In the search bar at the top, type EC2 and open the EC2 service.
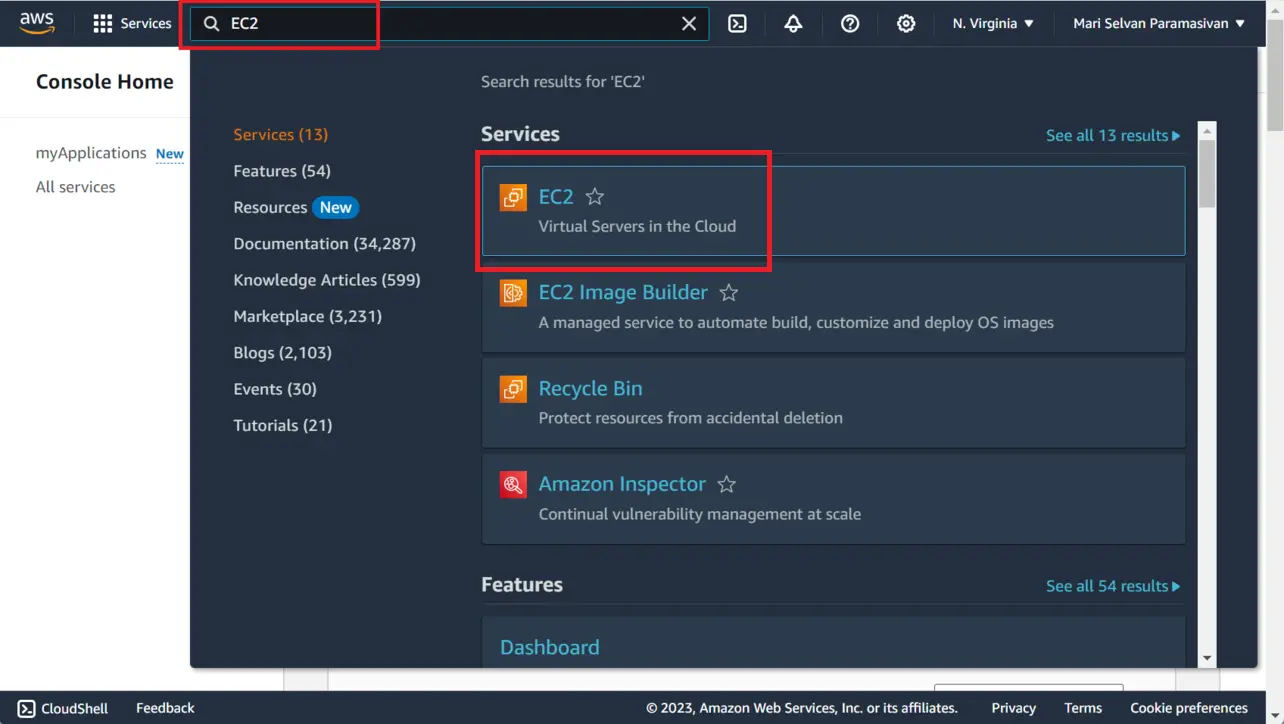
AWS Management Console On the EC2 dashboard, open Instances in the left navigation, then choose Launch instance.
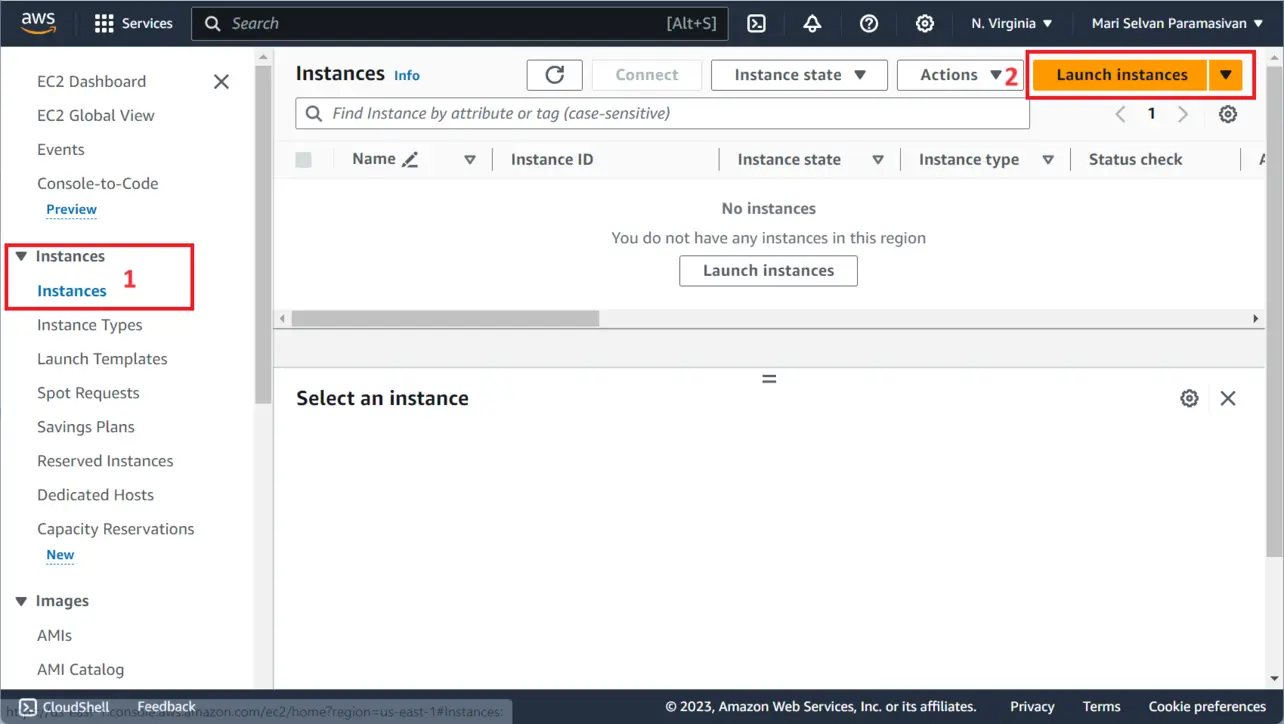
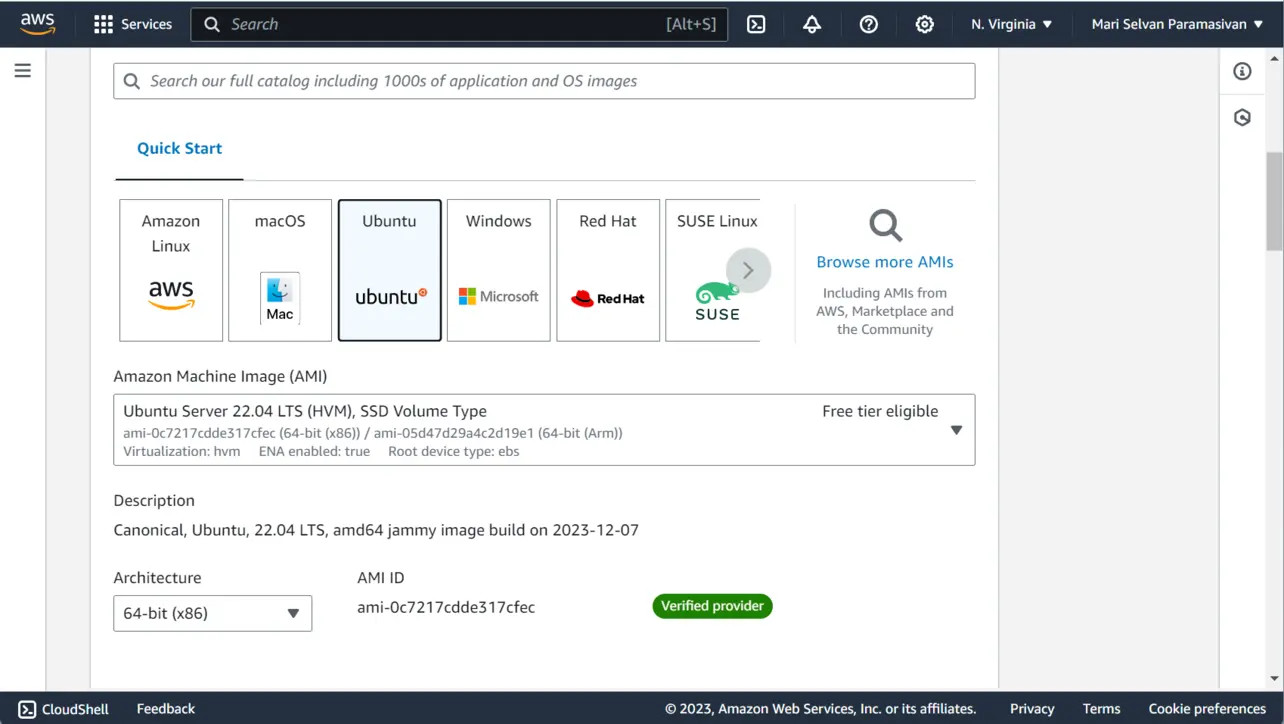
Amazon EC2 Give the instance a name (optional but helpful). Under Application and OS Images (Amazon Machine Image), choose Ubuntu Server (pick a supported LTS release shown in the console).
Amazon EC2 On the Instance type step, select a size that matches your workload. For learning, a small burstable type such as t3.micro or t2.micro is often enough (free tier eligibility varies by account and Region—check the console banner).
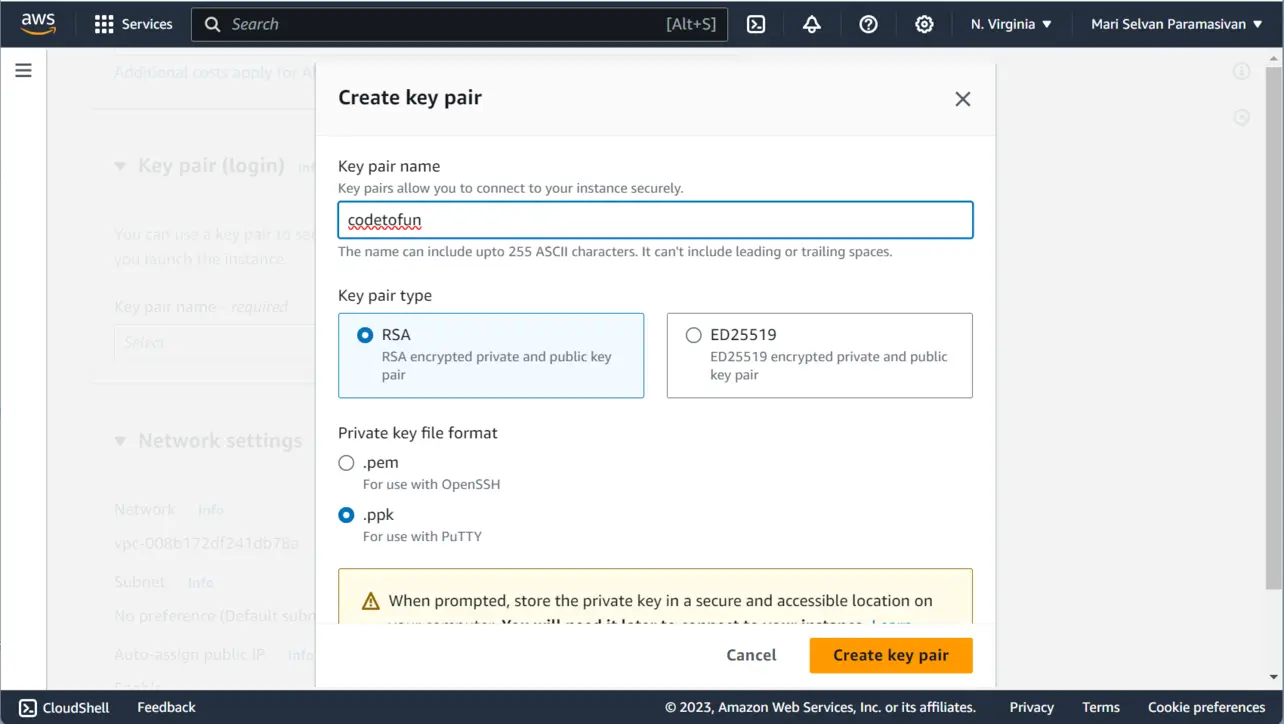
Under Key pair (login), choose Create new key pair if you do not already have one for this machine.
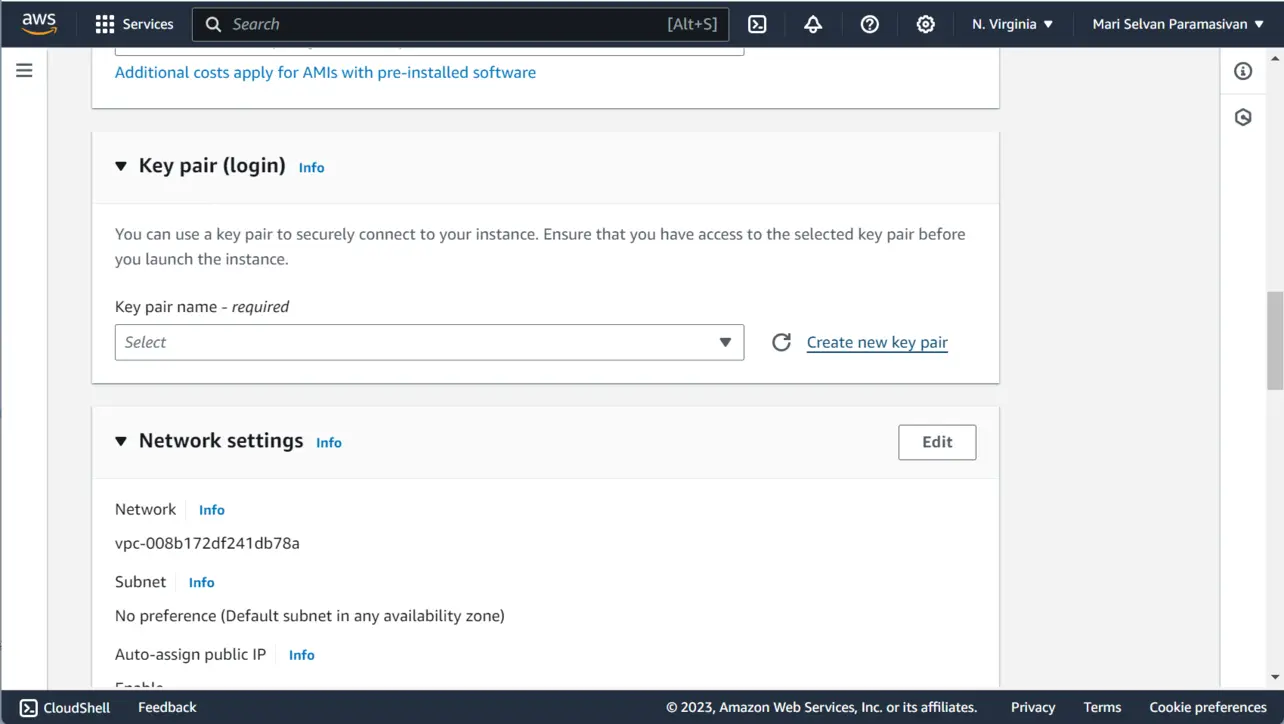
Amazon EC2 Configure the key pair:
- Key pair name — choose any descriptive name.
- Key pair type — RSA remains widely compatible.
- Private key file format — choose .pem if you will use OpenSSH (
sshon macOS, Linux, or Windows Terminal). Choose .ppk if you will use PuTTY on Windows. The example screenshot uses .ppk; pick the format that matches your SSH client.
Choose Create key pair. Your browser downloads the private key once—store it safely; AWS does not show it again.
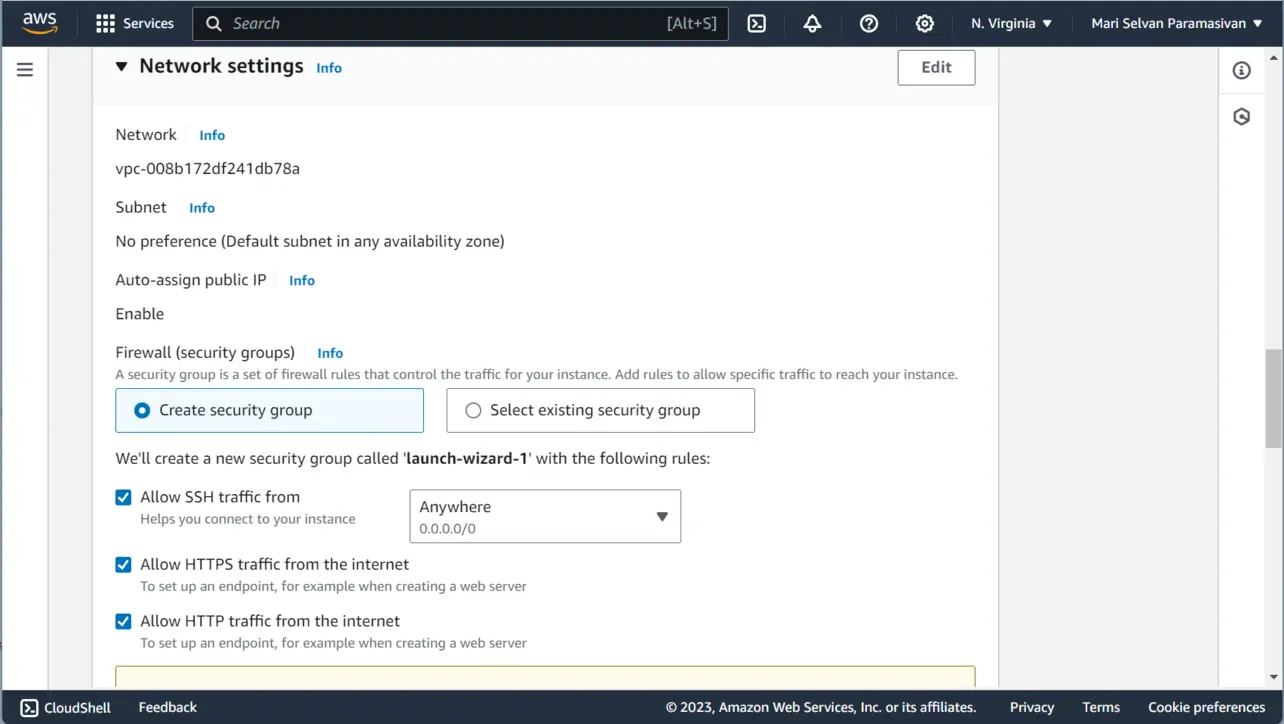
Amazon EC2 In Network settings, configure the security group so you can reach the instance. For a first web server lab, the console often offers checkboxes similar to:
- Allow SSH traffic from your IP or from the internet (narrow SSH to your IP in production).
- Allow HTTPS from the internet if you plan to serve TLS.
- Allow HTTP from the internet if you plan to serve plain HTTP.
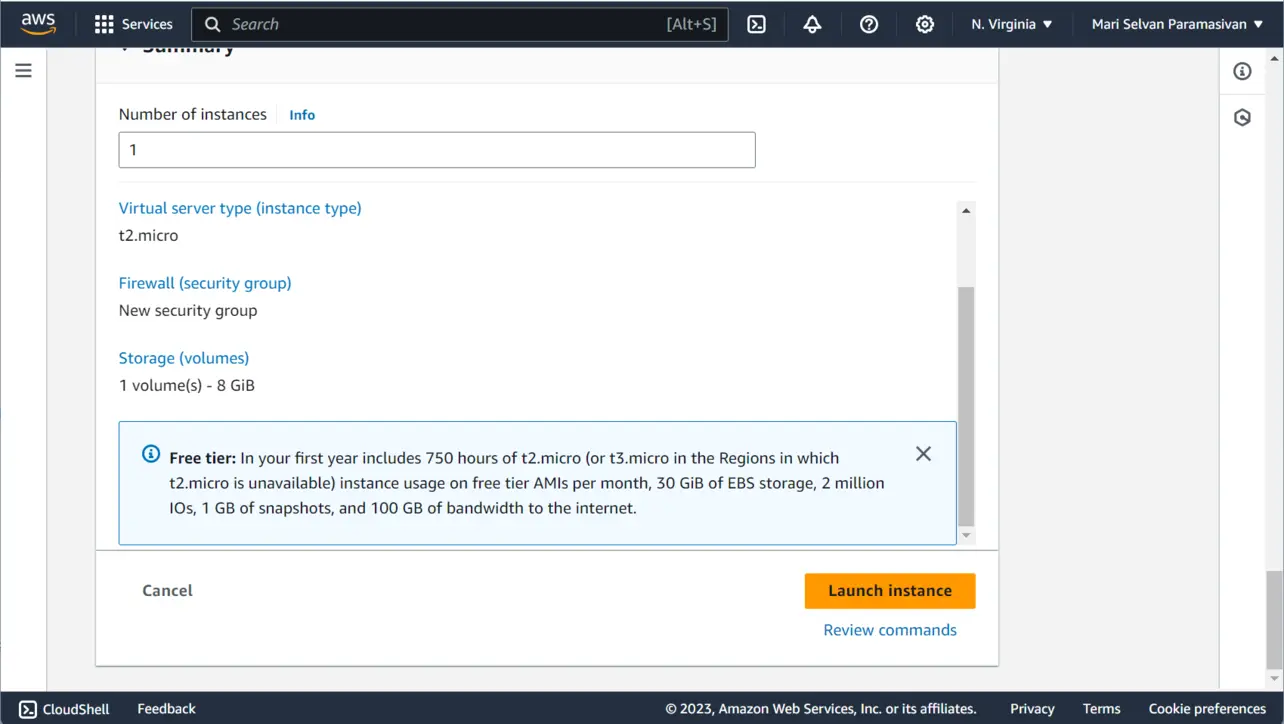
Amazon EC2 Review storage and advanced options if needed, then choose Launch instance.
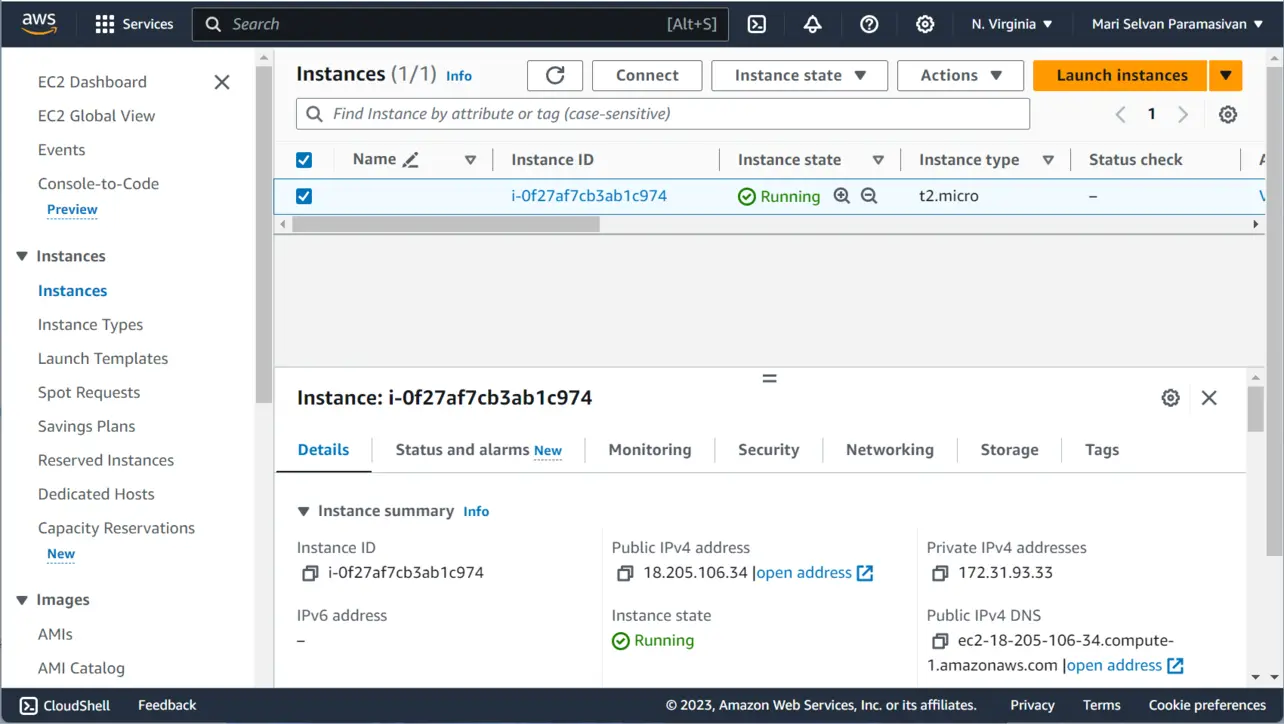
Amazon EC2 Return to Instances and wait until Instance state shows Running and status checks have passed.
Amazon EC2
Key takeaways
Pick an AMI (here, Ubuntu) and an instance type sized for your workload and budget.
Download and guard the private key (.pem or .ppk)—it is the password-less way into the instance for SSH.
The security group is a stateful firewall; only open ports you truly need, especially for SSH.
Frequently asked questions
Next: stable public IPv4
Allocate and associate an Elastic IP so your instance keeps the same public address across restarts and for DNS records.
EC2 bills for running instances and attached storage. Stop or terminate instances you do not need, release unused Elastic IPs, and review Cost Explorer so surprise charges do not accumulate while you experiment.
About the author


8 people found this page helpful